Real-Time Data Collection
The Data Studio can perform real-time data collection and labeling from any sensor over Serial COM, Bluetooth-LE, or Wi-Fi radios. You can use any third-party device in the Data Studio by updating the device firmware to our open-source Simple Streaming specification.
Open Live Capture Mode
Next, we are going to go over how to use Live Capture Mode within the Data Studio to collect data from a sensor in real-time.
Open your project in the Data Studio
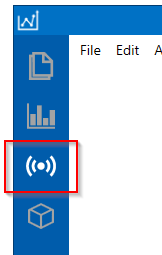
Click on the Live Capture button in the left navigation bar
Configure Your Sensors
Next, we are going to setup the sensor settings we will use for data collection.
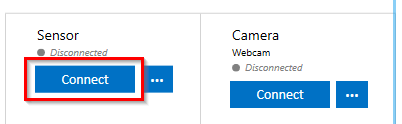
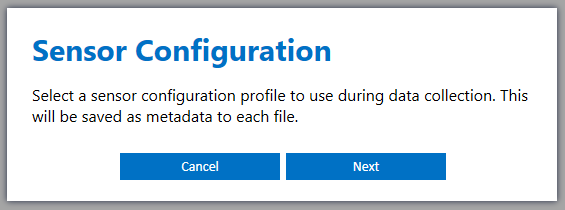
Click the sensor Connect button to setup your Sensor Configuration profile
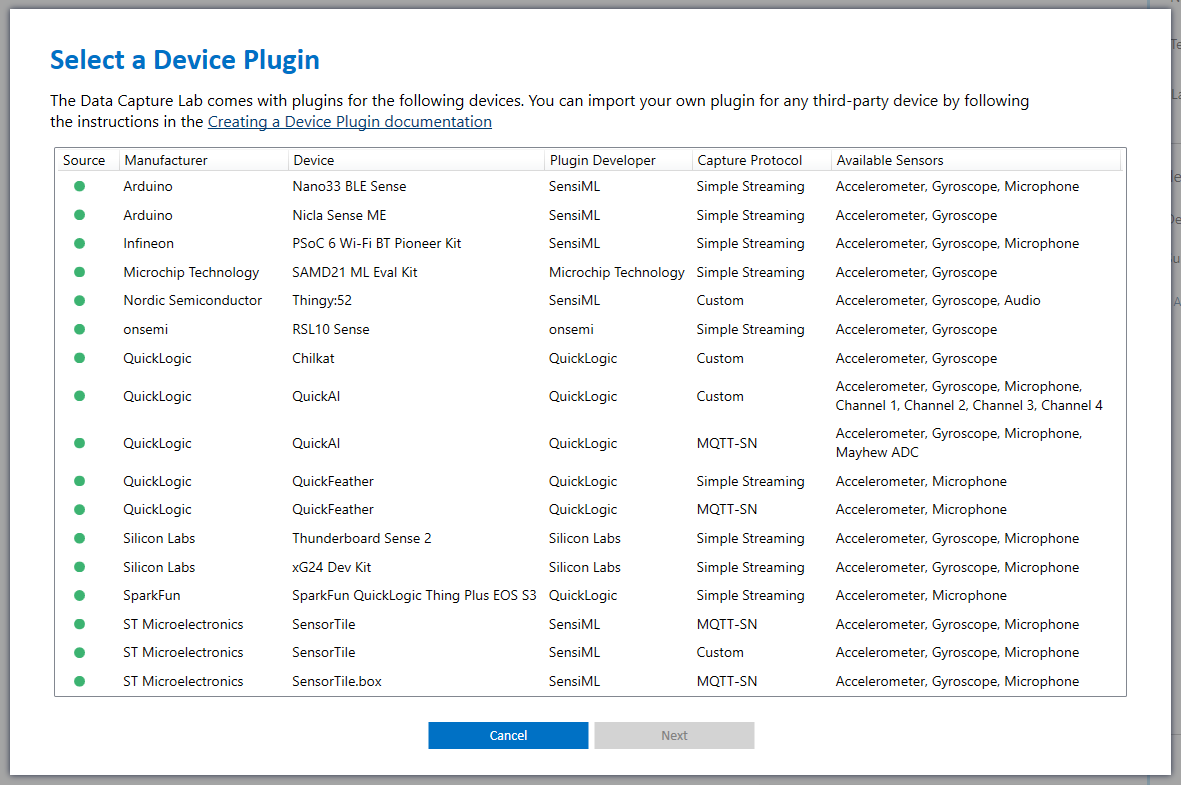
Click Next to select the device plugin to use in your Sensor Configuration
Select a plugin for the device you wish to use during data collection. If you are using a device not listed in the supported devices you can see more on how to implement your own plugin for data collection in the Adding Custom Device Firmware Documentation
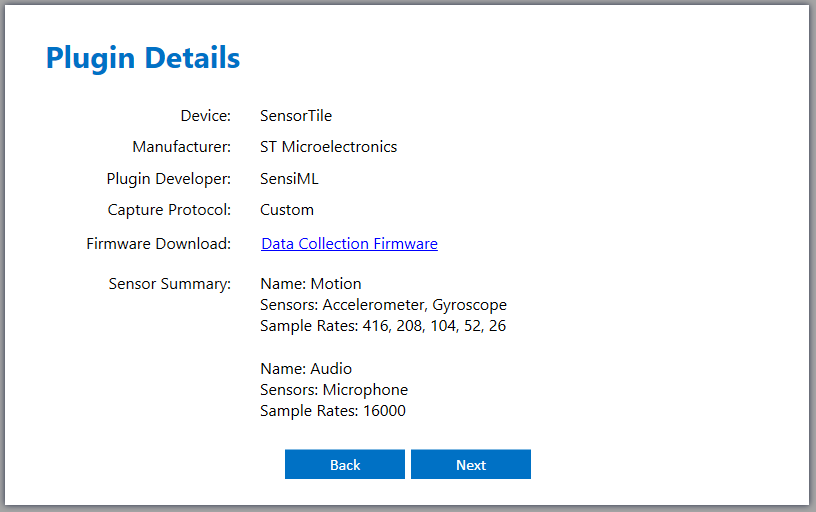
After selecting a plugin, the Data Studio will show more information about the plugin including the available sensors and documentation links. Each plugin will have different available options. Click Next to move to the sensor properties screen
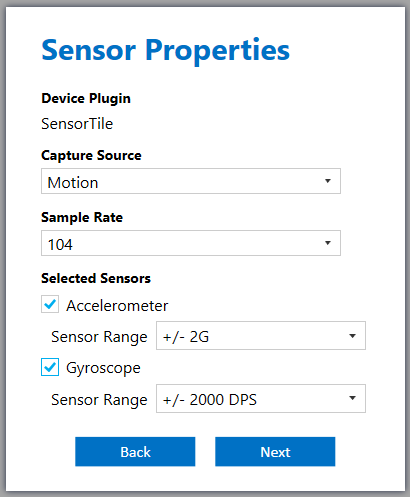
Select the sensor properties you wish to use for data collection and click Next.
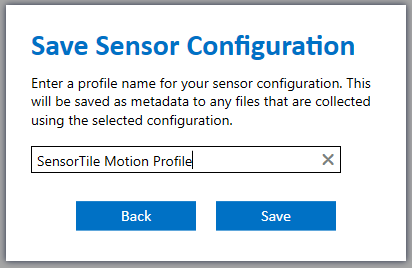
Enter a profile name for the sensor configuration and click Save
Start Recording Data
Before you can use your device for data collection make sure it is flashed with data collection firmware. You can find more information on data collection firmware options and flash instructions in the Flashing Data Collection Firmware Documentation.
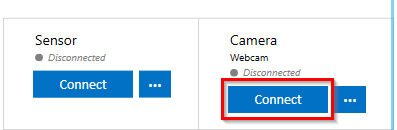
After setting up your Sensor Configuration profile, click Connect to connect to your device
Select the file settings you wish to save to your file during data collection
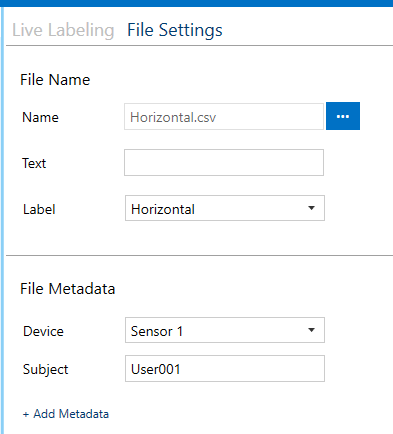
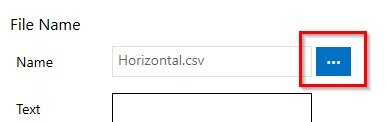
(Optional) Click the settings button next to the file name to customize your file name template
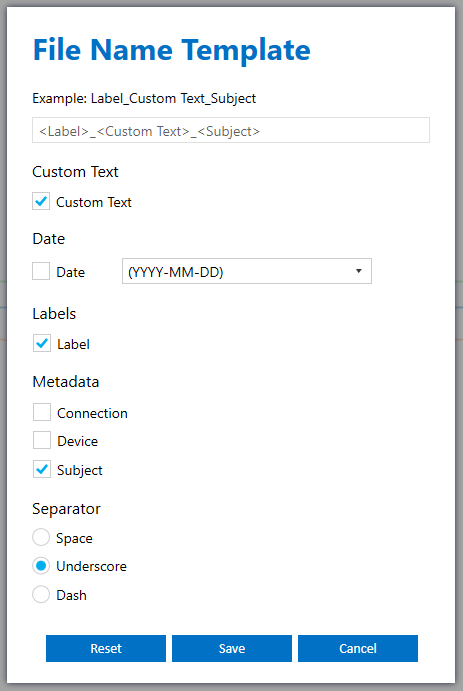
(Optional) The file name template screen lets you customize how the files you collect will be saved to your computer
(Optional) You can record video from a webcam or screen capture to sync with your sensor data. The Data Studio uses the SensiML Open Gateway application to record video. See the SensiML Open Gateway documentation for more details
Click Start Recording and the Data Studio will start recording based on your selected collection method. If you are using a connection that streams the data (Bluetooth-LE, Serial, etc) then the Data Studio will automatically save the file to your local hard drive and upload it to the cloud
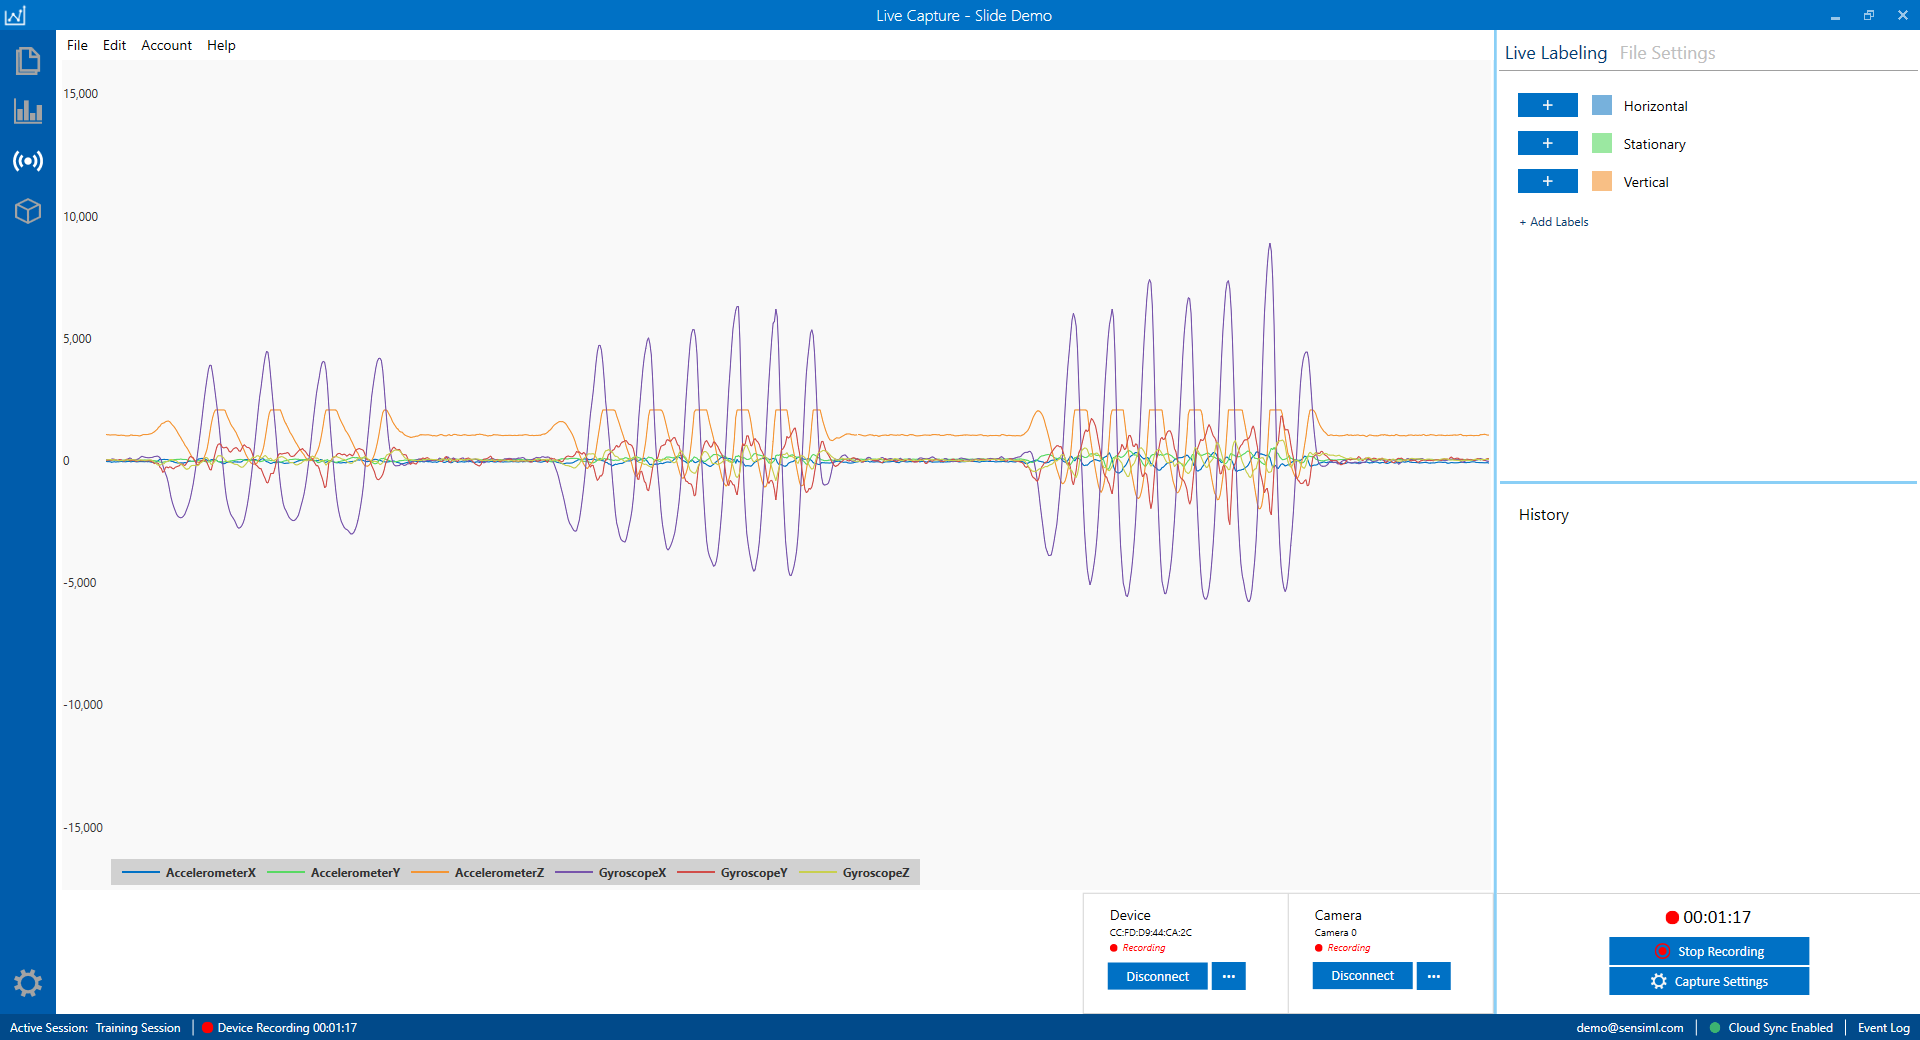
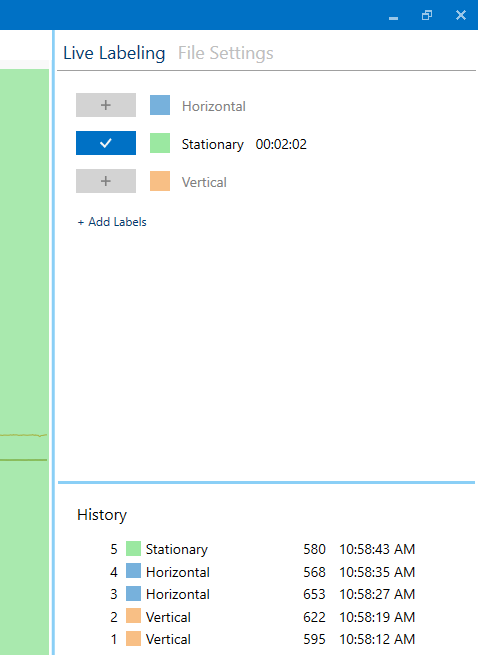
(Optional) You can create labels in your file during data collection by using the Live Labeling feature. Live Labeling lets you label your events in real-time during data collection. Click the + button on any label to add a label to your file