ST SensorTile
Flashing SensorTile Firmware
Data Collection Firmware
In the links below you can find the firmware for flashing a SensorTile device with data collection firmware for use with the SensiML Data Studio.
Sensors |
Protocol |
Download |
Build Version |
|---|---|---|---|
Accelerometer/Gyroscope (1660, 833, 416, 208, 104, 52, 26 Hz) Audio (16 Khz) |
MQTT-SN |
||
Accelerometer/Gyroscope (416, 208, 104, 52, 26 Hz) Audio (16 Khz) |
BLE Protocol |
Note
Data Collection Firmware is required to record data with the Data Studio. Data collection firmware uses large portions of RAM to enable SD card collection, and is disabled when running a Knowledge Pack.
Firmware Source Code
Firmware source code for both data capture and recognition can be found on Bitbucket at https://bitbucket.org/sensimldevteam/sensiml_sensortile_project/src/master.
Configuring your Nucleo Board for the first time
Obtain ST-LINK device such as a STM32 Nucleo board, which bundles an ST-LINK V2.1 debugger and programmer.
Download and install ST-Link Utility from STMicro for flashing
When you first receive your Nucleo board there is a first time setup step. (Full Documentation: STM SensorTile Documentation under UM2101 user manuals)
Nucleo Boards First Time Setup
Ensure that both jumpers on CN2 are OFF
Connect an external ST-LINK to the SWD connector on the cradle paying attention to the polarity of the connectors. (a 5-pin flat cable is provided in the SensorTile Kit package)
Pin 1 on the STM and Sensor Tile is identified by:
A small circle on the PCB silkscreen – STM32 Nucleo board and SensorTile cradle expansion
The square shape of the soldering pad – connector on the SensorTile cradle
Pin 1 on the flat-cable is identified by a small triangle on the connector
STM32 Nucleo board, cradle and cradle expansion SWD connectors
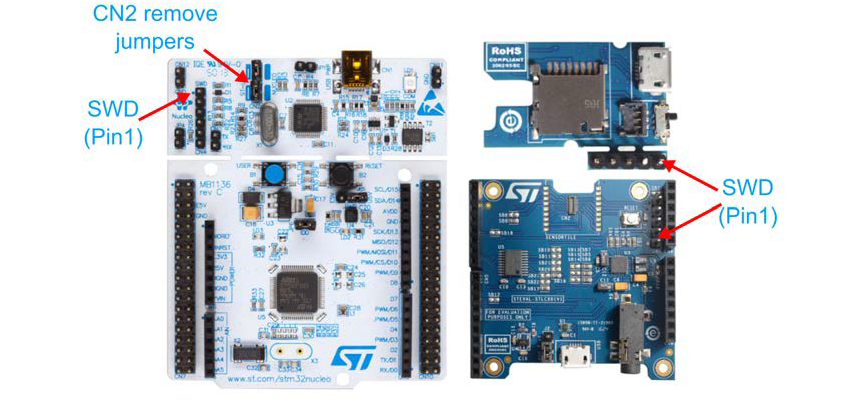
SWD connections with 5-pin flat cable
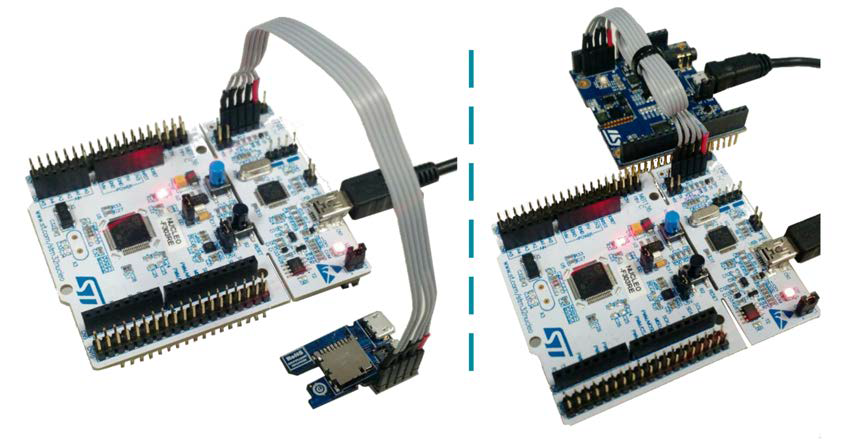
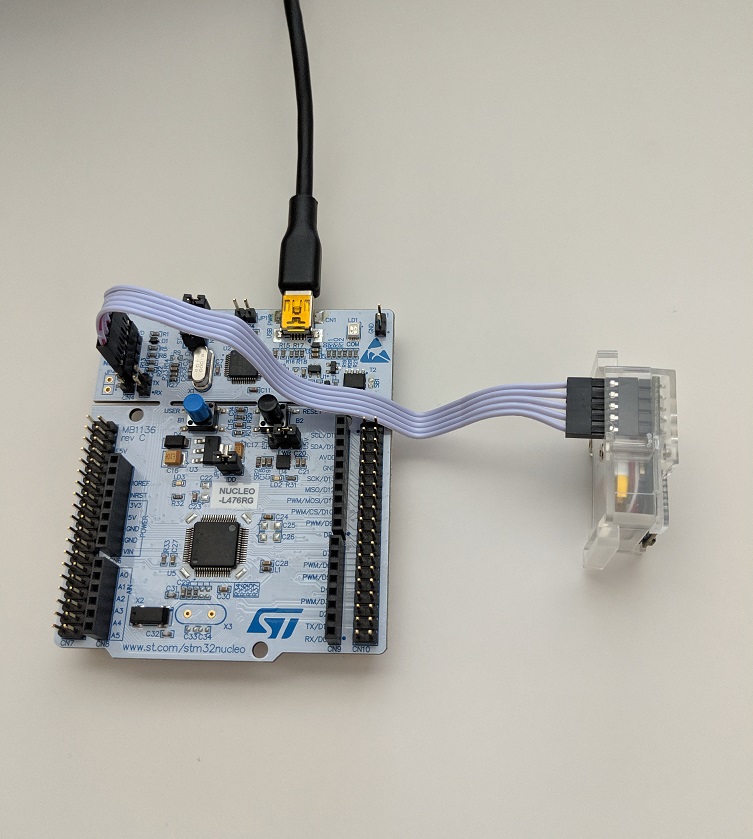
Connecting to the SensorTile Board
See Pictures for the connection between your Nucleo board and your assembled SensorTile.
Nucleo and connected SensorTile
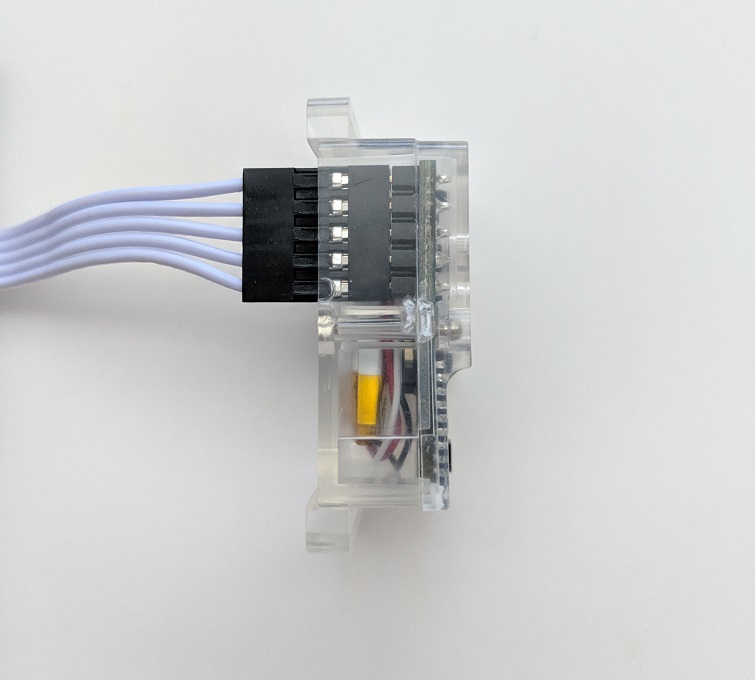
Close up view of SensorTile connection
Flashing SensorTile With ST-Link Utility
Windows GUI
Important
Ensure your device is powered on before you begin
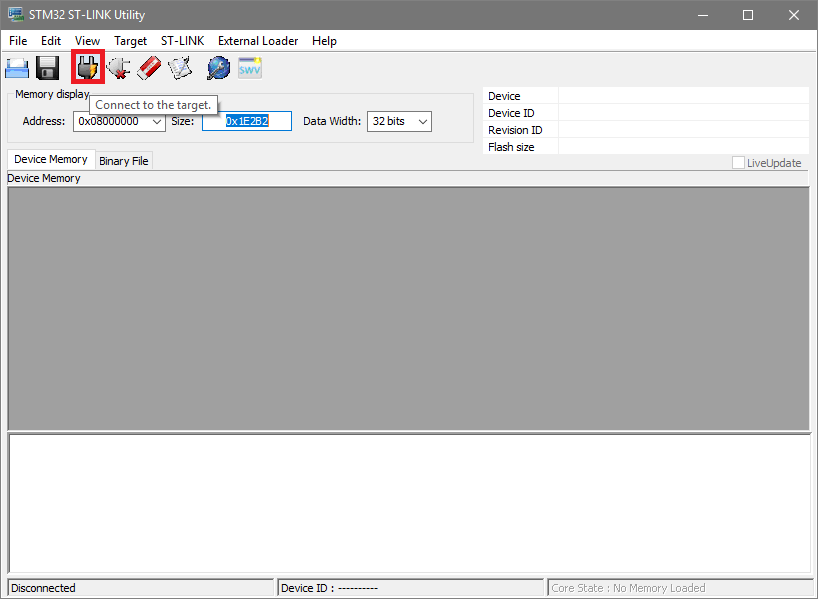
Ensure your device is connected to the ST-Link and powered on. Open the ST-Link Utility application.
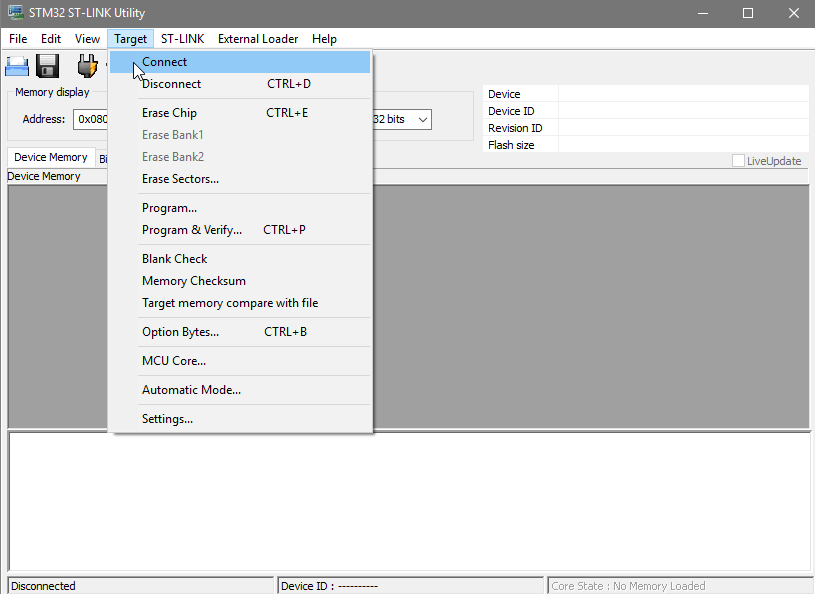
Click on the connect to target button, or Target → Connect to Target
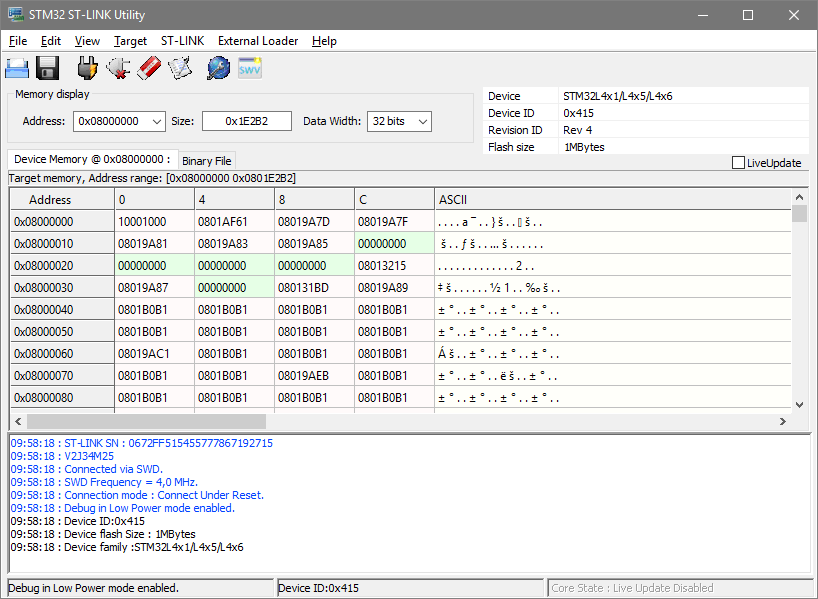
Once connected, you should see some of the memory dump of the chip:
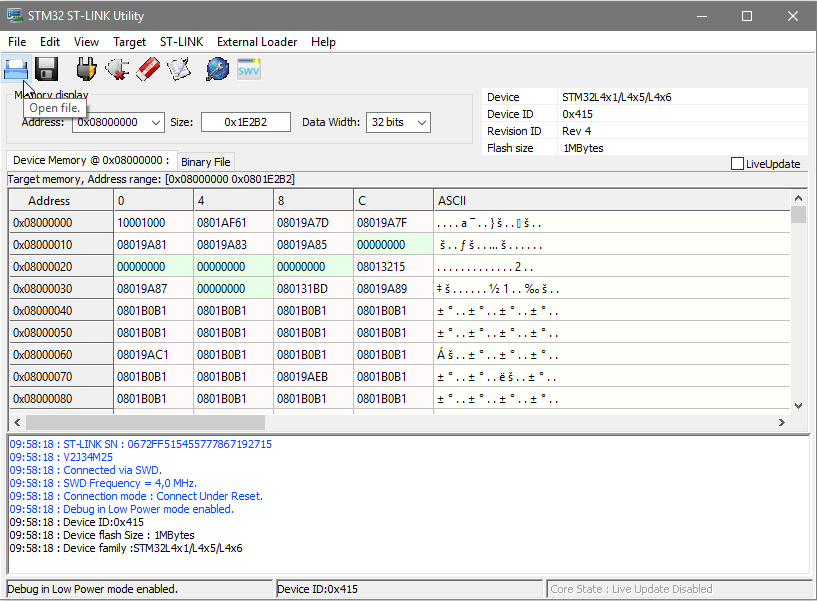
Click on Open File:
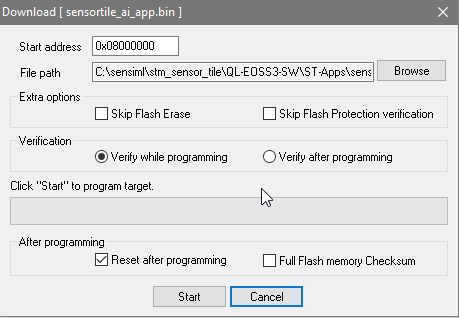
Select the binary you wish to flash. Now click on Program Verify (Ctrl+P)
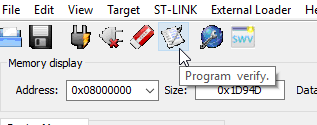
This will bring up the Download screen. You can leave all options the same and click “Start”
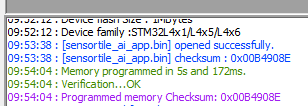
Once it is complete, you will see ‘Programmed memory Checksum’
STLink From Command Line
Using the command line requires ST-LINK_CLI.exe to be in your path. The installer adds this by default.
This command will be assuming you have ONE ST-Link capable device plugged into your computer. Should you have multiple, select which STLink to connect to with ID=<number>
ST-LINK_CLI.exe -c ID=0 SWD UR Hrst -Q -P <PATH_TO_BINARY_FILE> -V -HardRST HIGH -Rst
Using J-Link and JFlash-Lite
NOTE: JFlash-Lite is not recommended for production by Segger, only for debug purposes
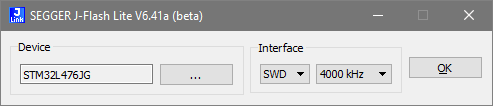
Open JFlash-Lite and select your device. it is an ST STM32L476JG. Leave Interface at SWD and Speed 4000kHz.
Select your binary file:
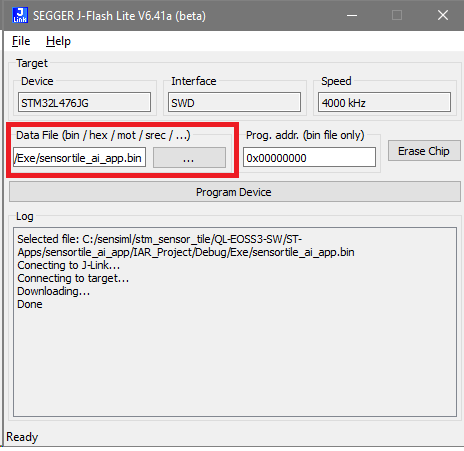
Click on Program Device. The default address of 0x08000000 is correct for the ST SensorTile
Viewing Knowledge Pack Recognition Results
When a Knowledge Pack is flashed on the board, the classification results can be viewed by connecting to the virtual COM port in a terminal application. Follow the steps below for viewing the recognition results:
Plug in your SensorTile device via serial USB cable
Open a terminal emulator (such as Tera Term)
Set your serial speed to 115200
Create a new connection to your SensorTile device COM port
You will now see classification results printed in the terminal
Advanced: SensorTile SDK Integration
(Optional) See the Building a Knowledge Pack Library tutorial and IAR with SensorTile setup steps for how to integrate SensiML application code into the SensorTile SDK using IAR. This allows you to call Knowledge Pack APIs directly at the firmware level or customize your data collection firmware.