Silicon Labs xG24 Dev Kit
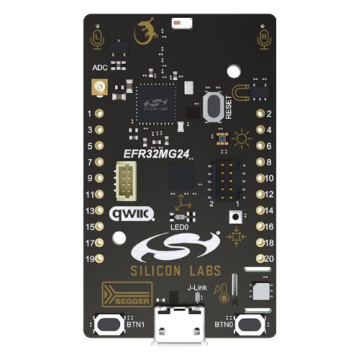
The xG24 Dev Kit is a compact, feature-packed development platform. The development platform supports up to +10dBm output power and includes support for the 20-bit ADC as well as other key features such as the xG24’s AI/ML hardware accelerator. You can find more information on the Silicon Labs xG24 Dev Kit at https://www.silabs.com/development-tools/wireless/efr32xg24-dev-kit
This guide will go over how to set up the Silicon Labs xG24 Dev Kit firmware for data collection or recognition. Once your device is configured, you can find a tutorial on how to use the SensiML Toolkit software in the SensiML Getting Started Tutorial.
Example Data Collection Firmware
In order to use the xG24 board for data collection it must be flashed with data collection firmware. We provide example firmware for using either the IMU (Accelerometer/Gyroscope) or Audio (Microphone) sensors below. We will go over how to build the firmware in Simplicity Studio in the next sections.
Sensors |
Protocol |
Pre-Built Hex Download |
Source Code |
|---|---|---|---|
Accelerometer/Gyroscope (102 Hz) |
Simple Stream V1.0 (Serial) |
||
Microphone (16000 Hz) |
Simple Stream V1.0 (Serial) |
Example Recognition Firmware
In order to use the xG24 board in recognition mode it must be flashed with recognition firmware. We provide example firmware source code for using either the IMU (Accelerometer/Gyroscope) or Audio (Microphone) sensors below. We will go over how to include your Model/Knowledge Pack in your firmware in the Flashing Knowledge Pack/Recognition Firmware section.
Sensors |
Source Code |
|---|---|
Accelerometer/Gyroscope (102 Hz) |
|
Microphone (16000 Hz) |
Initial Setup For Building Firmware
Firmware in this guide is flashed and compiled using Silicon Labs Simplicity Studio 5.
Install Simplicity Studio 5 at https://www.silabs.com/developers/simplicity-studio
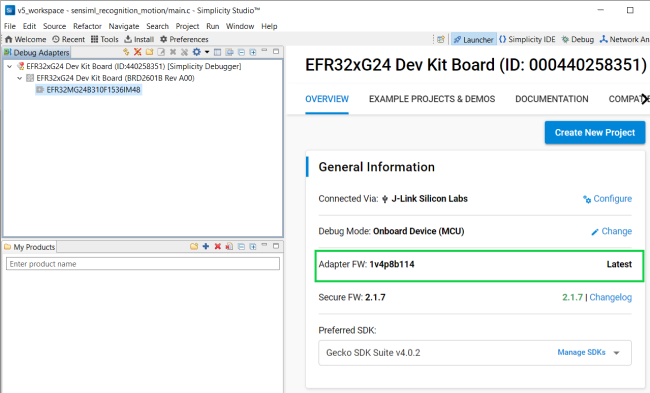
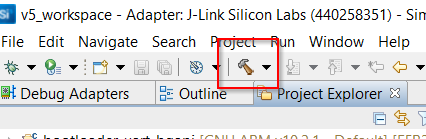
Before building or flashing the firmware, verify that the xG24 adapter firmware is up to date.
Open the Launcher tab in Simplicity Studio and check the status of the Adapter FW under General Information. The status should be
Latest, if the status isUpdatethen click the update link to download the latest version for the adapter firmware.
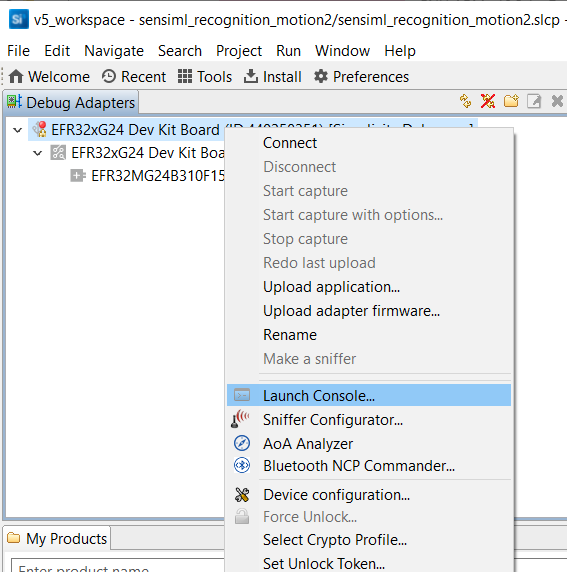
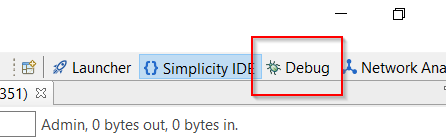
The example firmware in this guide uses a serial port connection. A debug VCOM port needs to be set up to use a serial connection. In the Debug Adapters window, Right + Click on the xG24 Dev Kit and select Launch Console… from the drop-down menu.
In the Console window select the Admin tab and type
serial vcom config speed 921600into the terminal input window and press Enter.
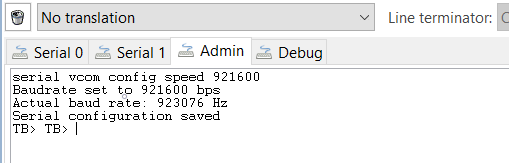
Your board is now ready for serial connections.
Building Firmware From a Pre-Built Hex File
Download and unzip the pre-built hex file from the Example Data Collection Firmware section above.
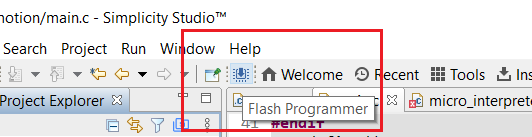
Select the Flash Programmer button from the toolbar in Simplicity Studio.
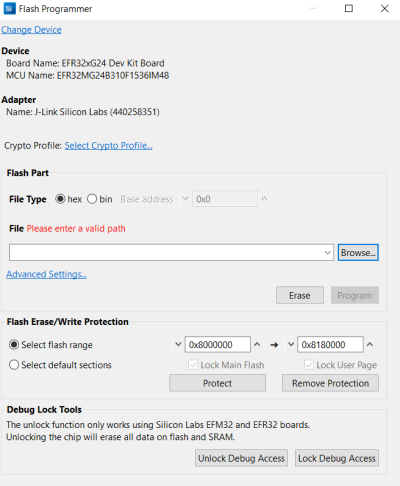
Click Browse to select the hex file you wish to flash and click Program
Flashing can also be done through running the debugger. The debugger will first flash your application and allow for breakpoints to be set. The application will remain in flash until another program replaces it.
Building Firmware From Source Code
Download or clone the source code from the Example Firmware sections above.
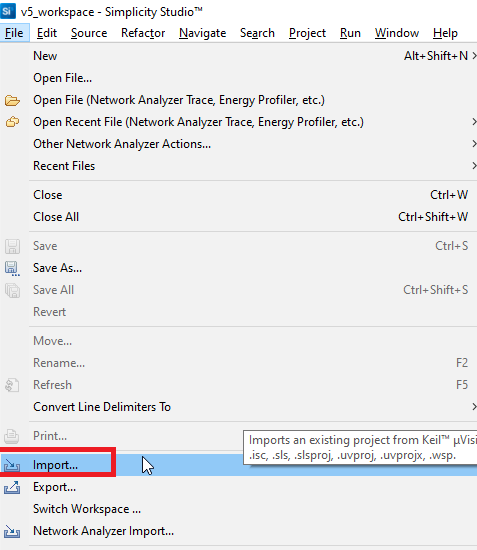
Select File -> Import in Simplicity Studio.
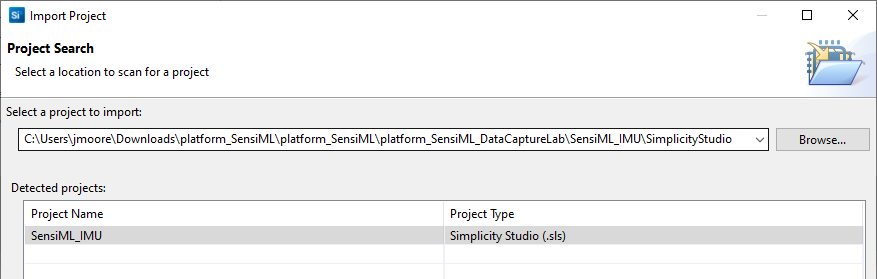
Navigate to the
SimplicityStudiofolder from the and select the .SLS file for the project.
Click Finish and Simplicity Studio will set up your workspace for building from source code.
Build the source code by clicking the Build button
(Optional) You can debug the source code with breakpoints by clicking the Debug button. You may need to set up a bootloader before you can debug.
Adding New Sensors to the Data Studio
The Data Studio includes a built-in device plugin for the xG24 Dev Kit IMU and Audio sensors. You can add additional sensors to your board and use them for data collection in the Data Studio by creating a custom device plugin. You can create a device plugin by defining your sensor information in an SSF file and importing it to the Data Studio. We provide an example SSF file for your device plugin named EFR32xG24-Dev-Kit-Board.ssf in the SensiML GitHub repository at https://github.com/sensiml/SensiML_xG24_IMU_Capture.
For more details on defining SSF file properties and implementing the Simple Streaming specification in your firmware see the Adding Custom Device Firmware Documentation.
Changing IMU Frequency/Sample Rate for Data Collection
The frequency/sample rate that IMU data collection firmware outputs is set at compile-time when you build from source code.
Open the file
app_sensor_imu.h.Update
#define ACCEL_GYRO_DEFAULT_ODRto set the frequency.Re-build the device firmware.
Flashing Knowledge Pack/Recognition Firmware
Download a Knowledge Pack Library from the Analytics Studio.
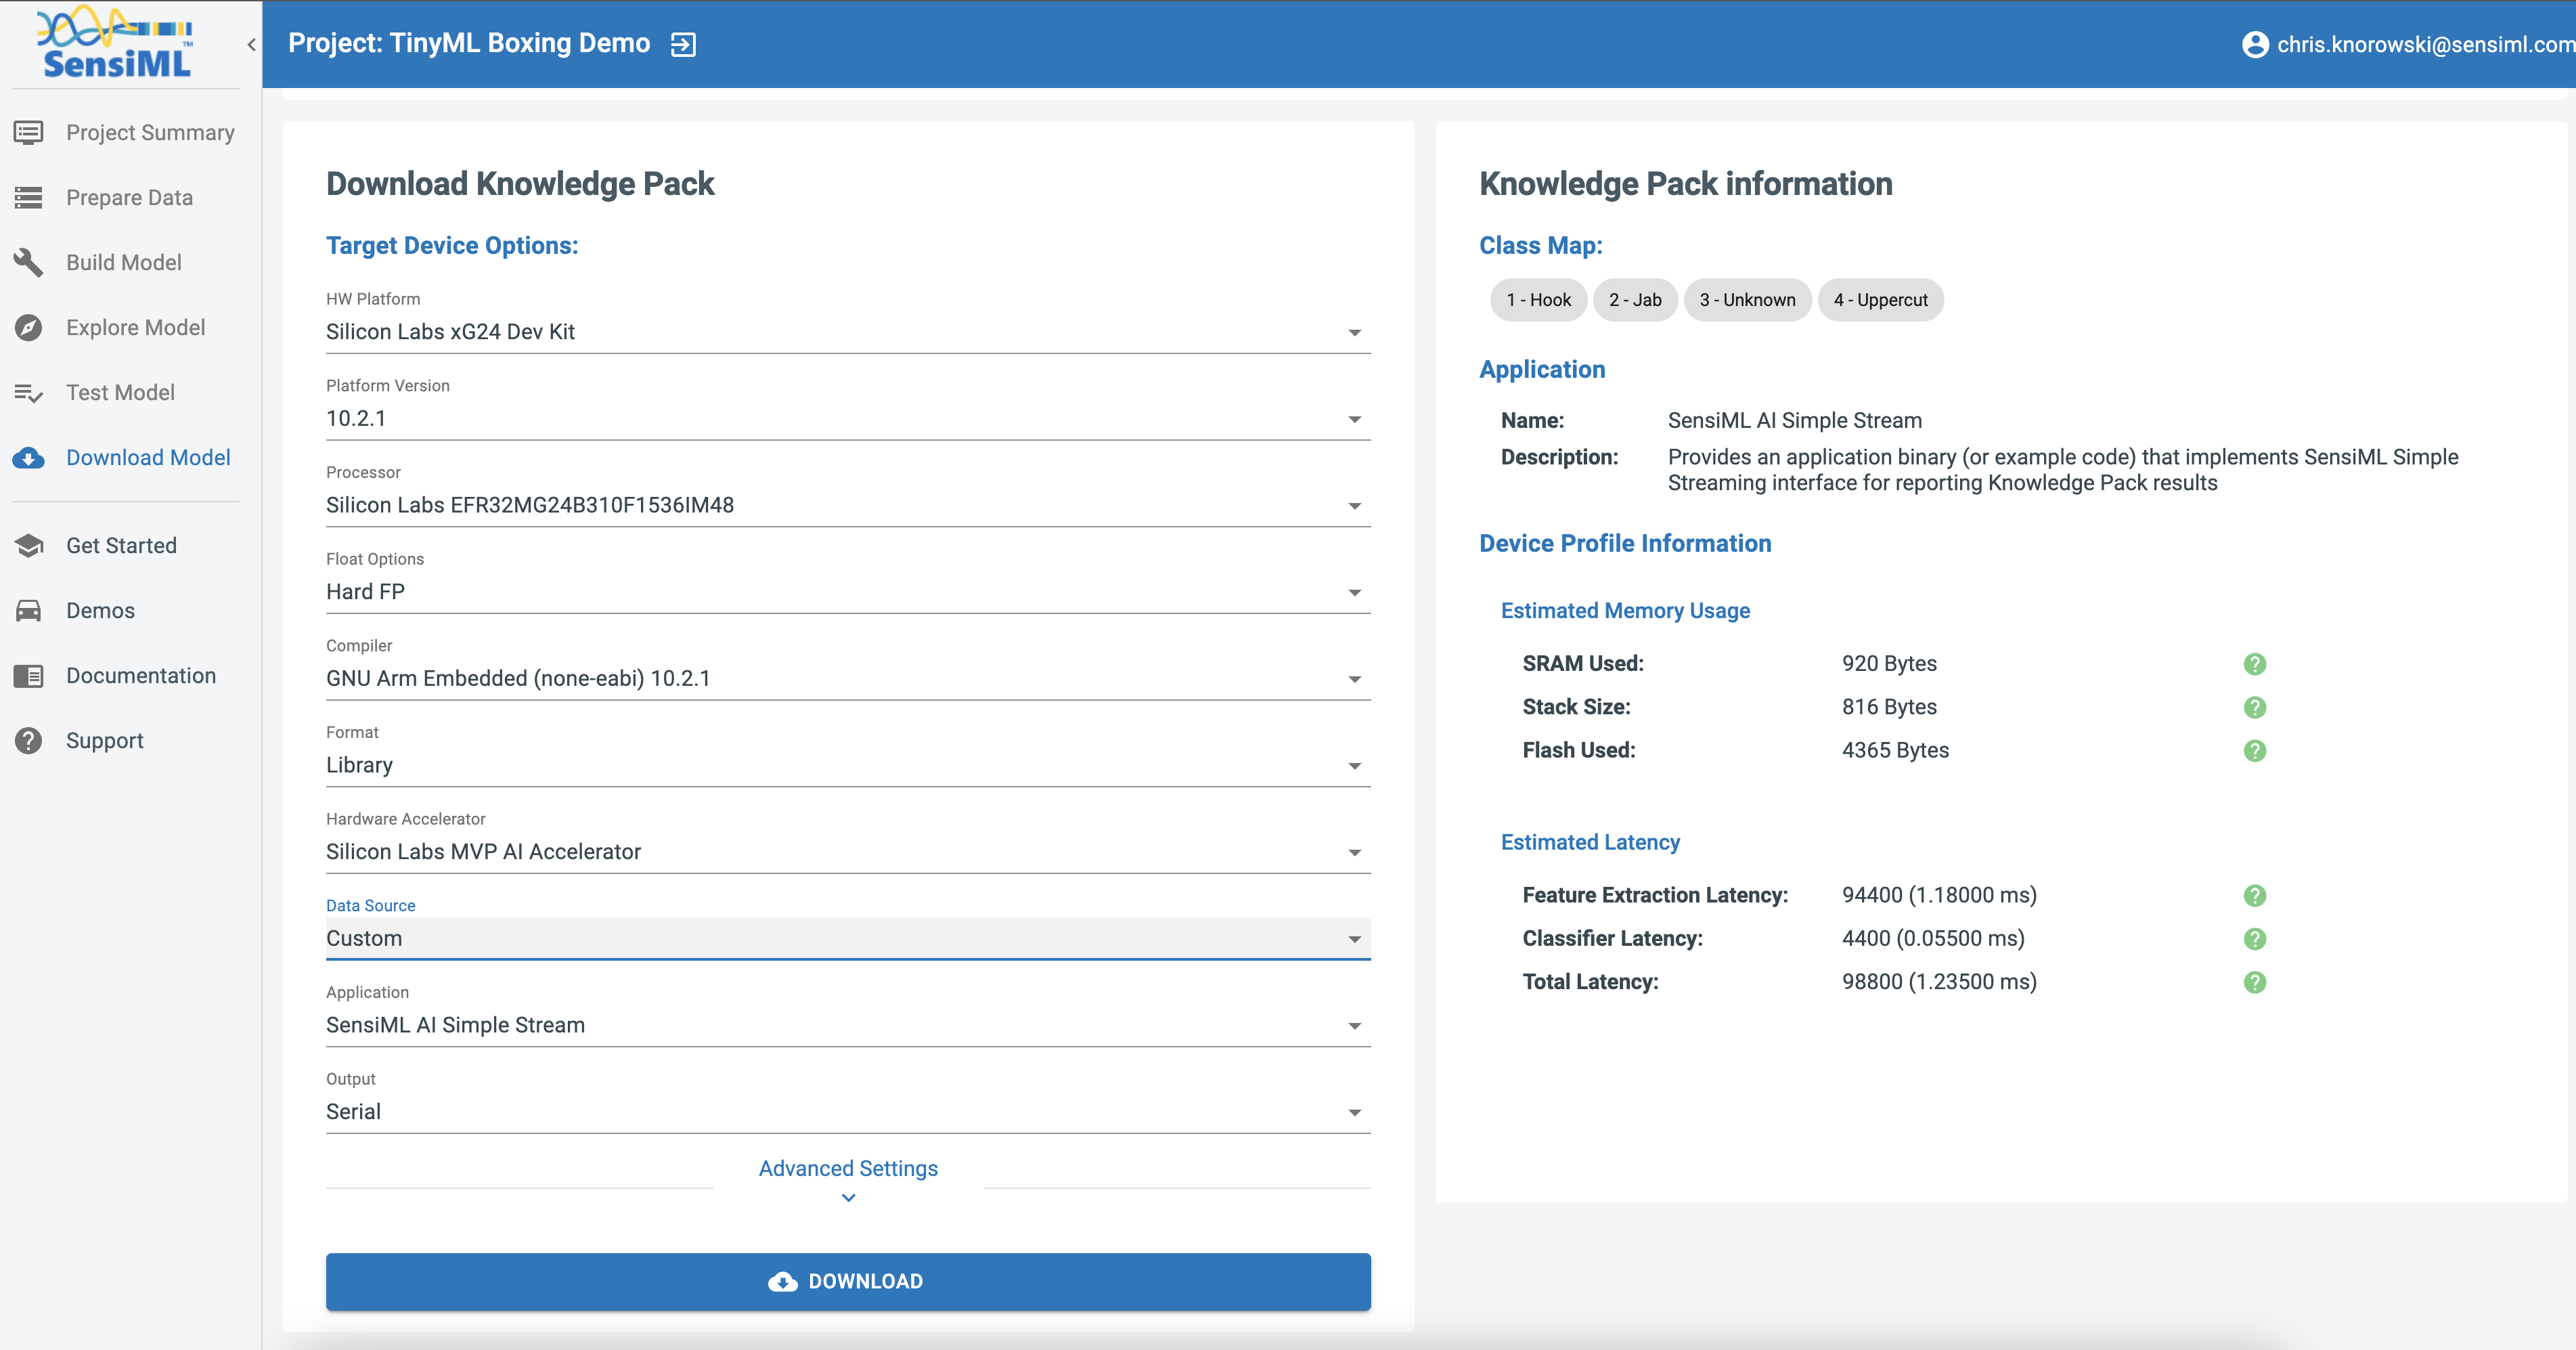
The Silicon Labs xG24 Dev Kit also includes the Matrix Vector Processor for accelerating Neural Network Ops. Select the Hardware Accelerator to take advantage of the processor.
Unzip the Knowledge Pack files.
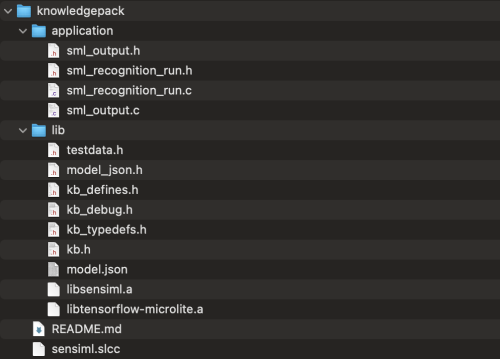
Follow the instructions for Building Firmware From Source Code above to import one of the Example Recognition Firmware projects into Simplicity Studio. This will create either a
sensiml_recogition_motionorsensiml_recogition_audioworkspace depending on the project you selected.Replace the
knowledgepackfolder inside your workspace with theknowledgepackfolder you extracted from the download and re-build the firmware.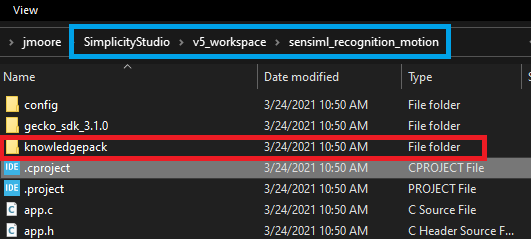
Viewing Knowledge Pack Recognition Results
When a Knowledge Pack is flashed on the board, the classification results can be viewed by connecting to the virtual COM port in a terminal application. Follow the steps below for viewing the recognition results:
Open a terminal emulator (such as Tera Term)
Set your serial speed to 921600
Create a new connection to your xG24 Dev Kit COM port
You will now see classification results printed in the terminal