M5Stack M5StickC PLUS ESP32-PICO Mini IoT Dev Kit
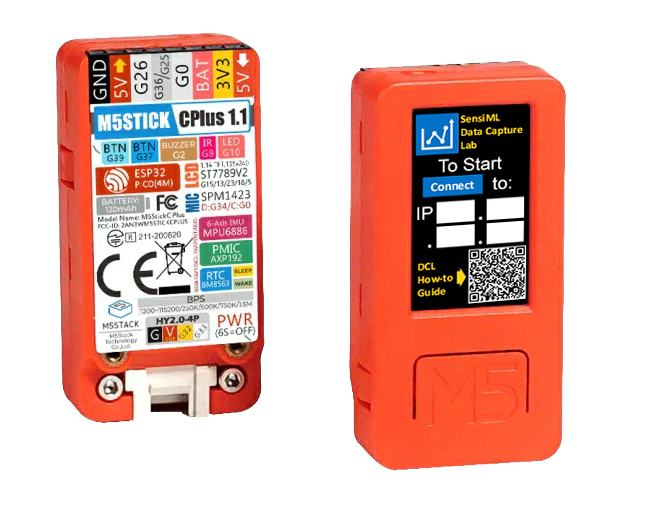
The M5StickC PLUS is powered by the ESP32-PICO-D4 with Wi-Fi, LCD screen, IMU, microphone, buttons, and extensible I/O for external sensors. It’s an easy-to-use, open-source, IoT development board that is both tiny and feature-packed enabling you to realize your smart IoT ideas and speed up your IoT prototyping efforts. More details can be found at the M5StickC-PLUS product page.
This guide will go over how to set up the example M5StickC PLUS firmware for data collection or recognition. Once your device is configured, you can find a tutorial on how to use the SensiML Toolkit software in the SensiML Getting Started Tutorial.
Example Firmware
Sensors |
Protocol |
Download |
Build Version |
|---|---|---|---|
Accelerometer/Gyroscope (1kHz, 500, 250, 200, 125, 100, 50, 10 Hz) |
Wi-Fi Protocol |
Example Firmware Overview
To allow for quick and easy evaluation of the SensiML Toolkit, we provide a reference firmware customized for the M5StickC PLUS. This firmware is offered as both a directly flashable compiled binary and as Arduino source code (sketch and associated libraries) to allow for modification to adapt for other use cases and sensors than those provided in the example.
Mode |
Description |
Features |
Screenshot(s) |
|---|---|---|---|
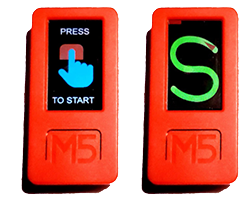
GAME Mode |
IMU-based ‘Wizard Wand’ gesture recognition game provided as an example of running SensiML knowledge packs locally on the device. Users have a fixed time limit to complete a series of alphabet gestures to win the game. |
|
|
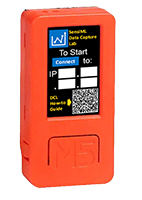
DCL Modes |
General purpose data collection using Wi-Fi streaming data endpoint to SensiML Data Studio |
|
|
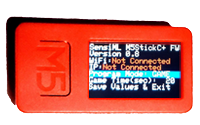
SETTINGS Mode |
Firmware configuration screen to setup various parameters like Wi-Fi credentials, game timer, DCL sample rate |
|
|
Installing the M5StickC PLUS Reference Firmware
Flashing from a Pre-Compiled Binary
The simplest approach to installing the firmware is to download the pre-compiled binary and ESPTOOL.exe flashing utility from the ZIP download using the instructions below.
Note
The steps below are for a Windows PC.
Extract the files from the zip download file link below into a directory of your choice.
Connect the M5StickC PLUS device to your PC via a USB cable.
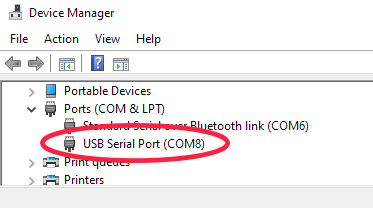
If not already known, utilize Windows Device Manager to identify the virtual COM port to which the USB connected M5Stick is assigned.
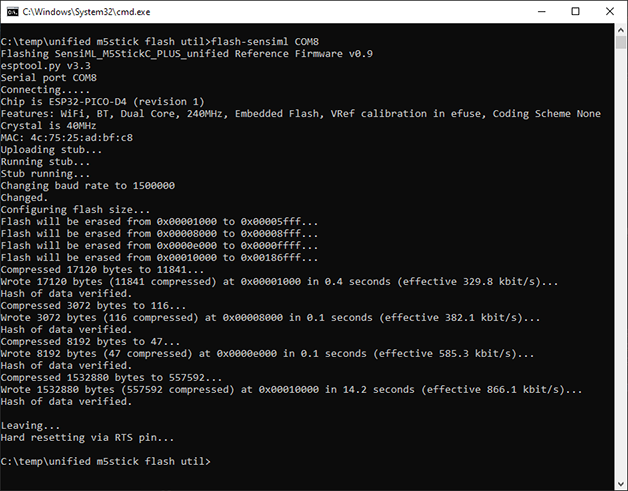
Open a command prompt and navigate to the directory created in step 1 above.
Type
flash-sensiml COMxwhere x is the COM port number you discovered above.If all goes well, the ESPTOOL utility will flash each of the pre-compiled bin files to the M5StickC PLUS. The output from the ESPTOOL flash utility should resemble what is shown below. If you encounter errors, make sure another program (i.e. Arduino IDE, terminal console app) is not already controlling access to the COM port.
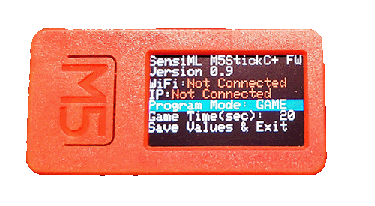
Confirm successful flashing of the device by noting whether the screen of the M5StickC PLUS appears as shown below.
Compiling From Source Code using the Arduino IDE
Alternatively, the firmware source code can be downloaded from SensiML’s GitHub and compiled using the Arduino IDE. This allows the flexibility to adapt the code to suit your own specific application needs, add other sensor types, and other customizations.
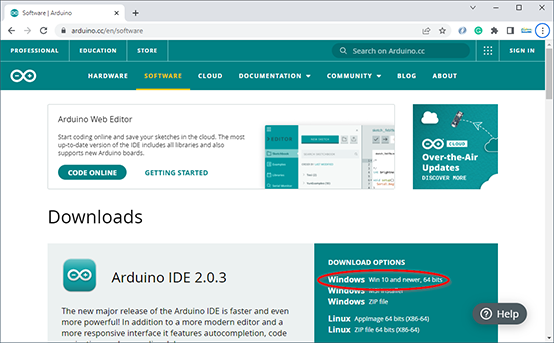
Install the Arduino IDE, if not already installed on your system.
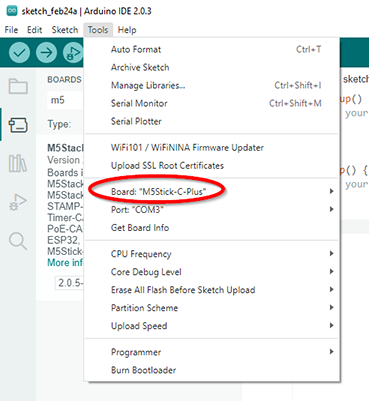
Follow the instructions on the M5Stack site to configure M5Stack board management and install the M5StickCPLUS board libraries within the Arduino IDE. When selecting the board, be sure to pick the
M5Stick-C-Plus. Under the Tools… menu the board listed should match.
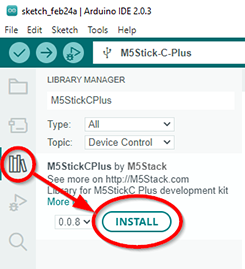
Next, download the additional M5StickCPlus libraries using the Arduino Library Manager. Click on the Arduino Library Manager icon, search for
M5StickCPlus, and install it. If asked whether to install with dependencies, select to install all dependency libraries as well.
Download the SensiML M5StickC PLUS reference firmware project from SensiML’s GitHub at https://github.com/sensiml/SensiML_M5StickC-PLUS
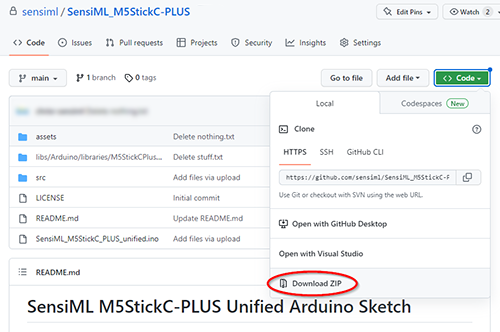
From the downloaded ZIP, extract the Arduino sketch folder
SensiML_M5StickC_PLUS_unifiedand all of its contents into your Arduino Sketchbook directory.
Note
The default Sketchbook folder is shown in the Arduino IDE under File > Preferences… and is typically set by default to C:\Users\<user>\Documents\Arduino
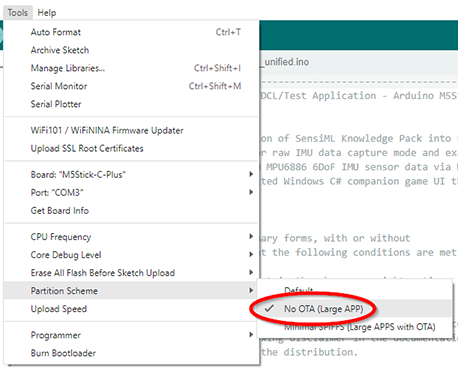
Our reference firmware is sufficiently large that we must change the default partition scheme before attempting to compile. To do this, select Tools > Partition Scheme > No OTA (Large APP).
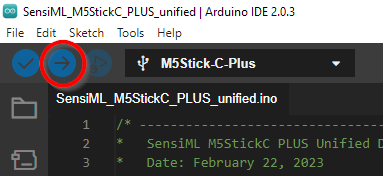
Finally, select the Upload button in the Arduino IDE to compile, link, and upload the resulting binary in one operation to the M5StickC Plus device. This step can take several minutes to complete.
Confirm successful flashing of the device by noting whether the screen of the M5StickC PLUS appears as shown below.
Game Mode Operation
Details of the Wizard Wand game mode operation can be found in the application examples under the Wizard Wand Gesture Game
Setting Up Wi-Fi Connectivity
In order to connect your M5StickC PLUS to the Data Studio application, it is first necessary to set your Wi-Fi network settings in the M5StickC PLUS.
Caution
As of v0.9, Wi-Fi credentials (including WPA2 password) are stored in the M5StickC PLUS EEPROM in unencrypted form (cleartext). Use caution in storing sensitive network credentials and/or use a separate Wi-Fi Access Point or hotspot connection for use and evaluation if this is of concern.
To setup the device’s Wi-Fi credentials, it is necessary to connect the M5StickC PLUS to the PC terminal application using a USB cable. We will utilize serial commands to setup the SSID, Wi-Fi password, and default program mode (GAME or DCL) in the device’s EEPROM memory. Once physically connected, establish a terminal console session (using Tera Term, PUTTY, Arduino Serial Monitor, or your other favorite serial console app). Connect at 460800bps (shown as 500000bps in Arduino IDE). The bootup message from the device should look similar to below:
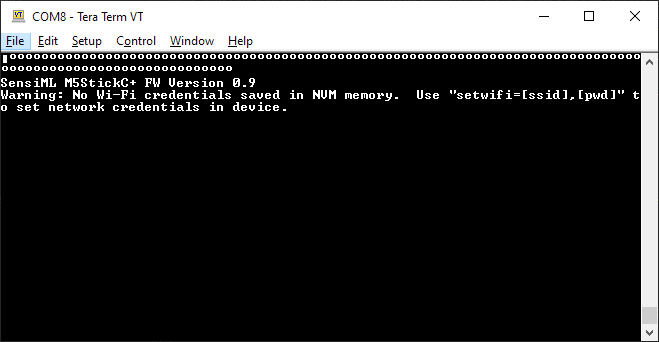
To set the Wi-Fi credentials, type setwifi=[ssid],[pwd] replacing [ssid] and [pwd] with your network’s info (exclude the brackets). Example: setwifi=mywifiap,badpassword
Press [Enter] and if the Wi-Fi credentials were accepted, the device will respond with “Successfully updated SSID and password in device NVM.” Now type reconnect and press enter try the network settings. If no connection is made after 30 seconds, the device will respond with ‘Connection attempt failed’. Otherwise the Settings menu should update to show the SSID and assigned IP address of the device on the network.
Other serial commands include:
setssid=[ssid] sets just the Wi-Fi SSID
setpassword=[pwd] sets just the Wi-Fi password
help display the serial command list
Setting Program Mode Settings
The Settings Menu can always be accessed by powering off (holding the power button on the side of the M5StickC PLUS for six seconds) and then powering on (briefly pressing the power button) while at the same time pressing and holding down the front button marked “M5” next to the screen.
Once the settings menu appears, serial console commands can be issued from a terminal console (see Setting Up Wi-Fi Connectivity) and the front “M5” button and side button on the right hand side of the M5StickC PLUS can be used to cycle through the on-screen settings and adjust their values. The front “M5” button changes the selected item, the right side button adjusts its value.
The Program Mode can be changed from GAME to DCL-AccGyr (for SensiML Data Studio application capture of raw accelerometer and gyro sensor data) to DCL-Acc (DCL capture of just the accelerometer sensor) and depending on the program mode selected, either the game time clock (GAME mode), or the sensor sample rate (DCL modes), can be adjusted. When done with settings, use the front button to select Save Values & Exit and then press the right side button.
Using Data Capture Lab Mode
When in DCL mode, the M5StickC PLUS can directly stream raw train/test IMU sensor data to the SensiML Data Studio application over Wi-Fi in one of multiple different sample rates as selected from the Settings Menu.
The device is in DCL mode and ready for data collection when the screen appears like that shown below:
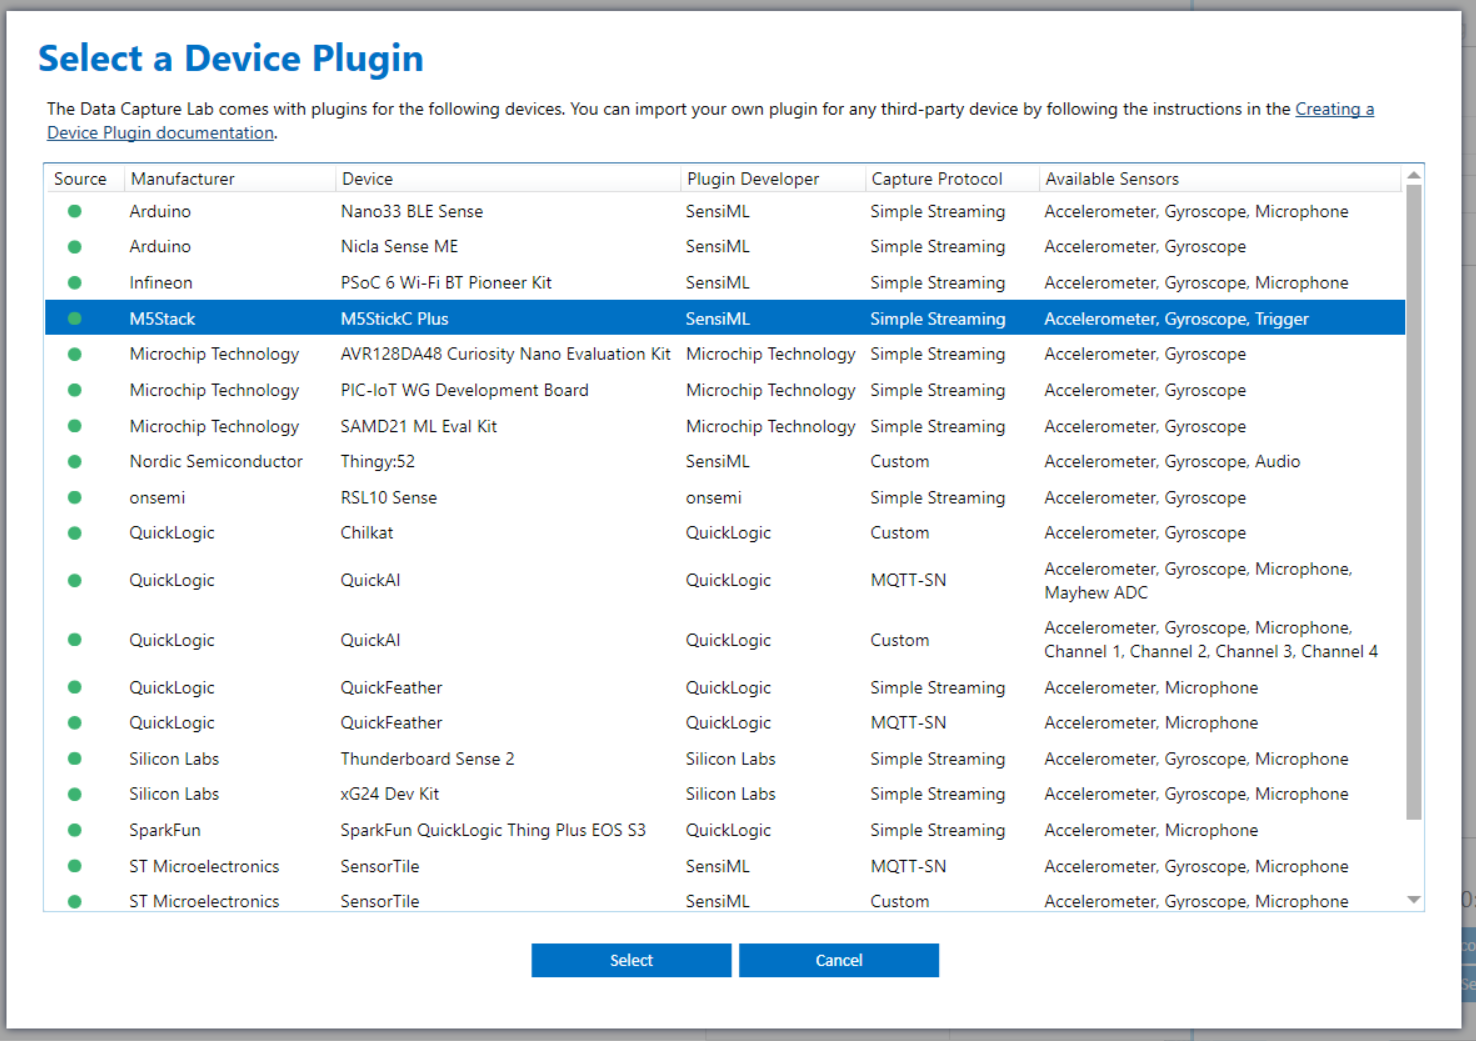
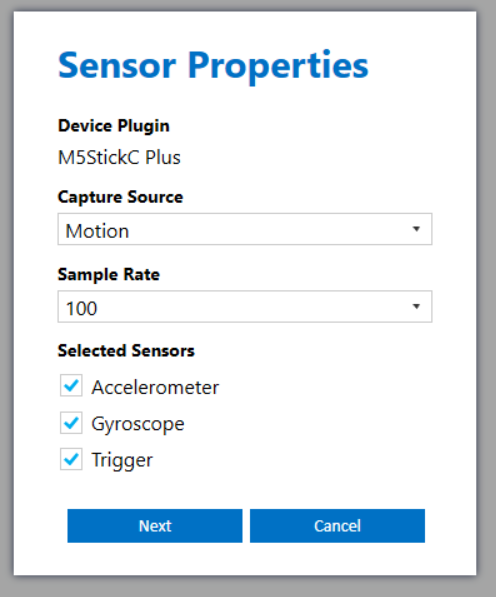
To connect to Data Studio, first the Data Studio project needs to be configured with the correct Sensor Configuration to match the M5StickC PLUS. Select “Next” at the Sensor Configuration screen:

Select the M5Stick:
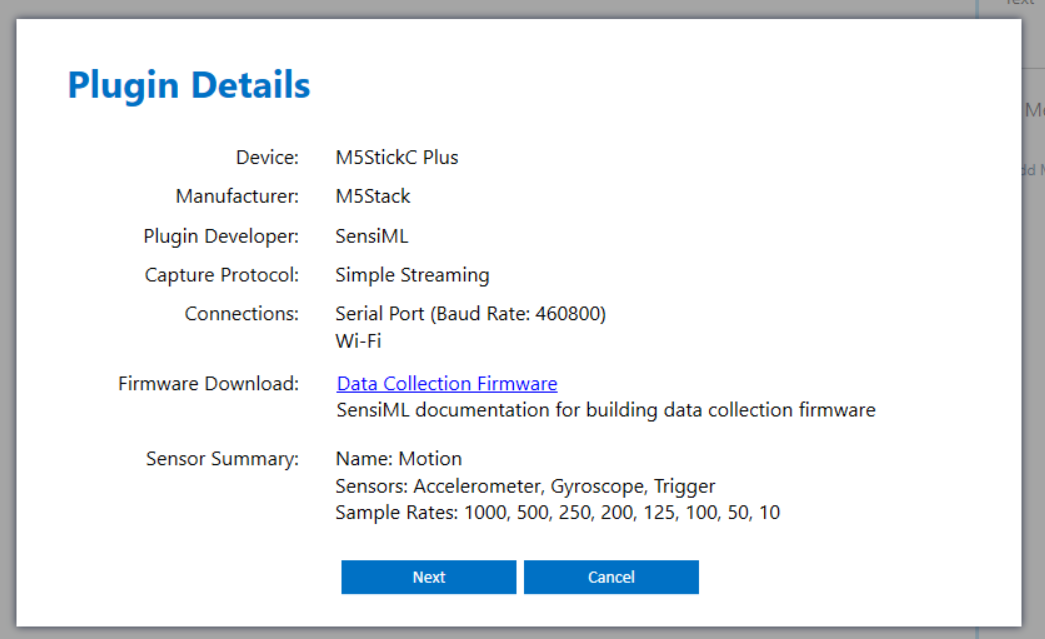
The M5StickC PLUS configuration details show the current device capabilities supported in the SensiML DCL:
Select “Next” to advance to the settings screen and select the sensors and sample rate appropriate to your project needs.
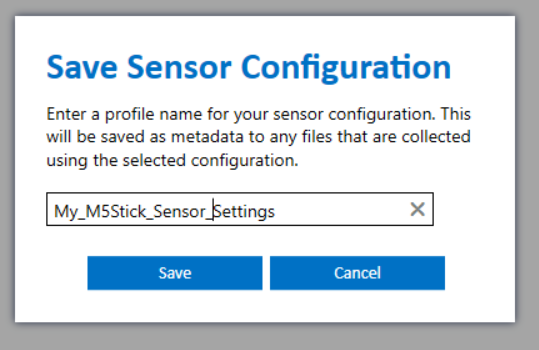
Give your project’s custom sensor settings a name and hit “Save”.
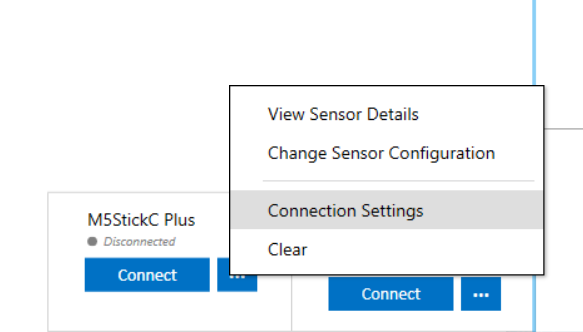
We can now proceed with setting up the Wi-Fi connection details. Click the “…” button to the right of the “Connect” button and click on “Connection Settings”.
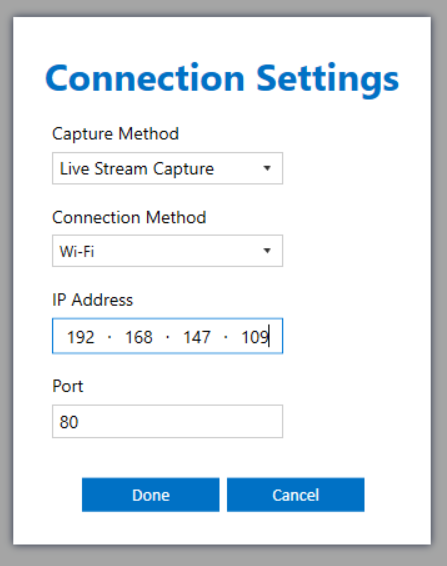
For ‘Connection Method’ choose Wi-Fi, then enter the IP address as it appears on the DCL mode startup screen of the M5StickC PLUS. Normally port should be left as 80. Click “Done”.
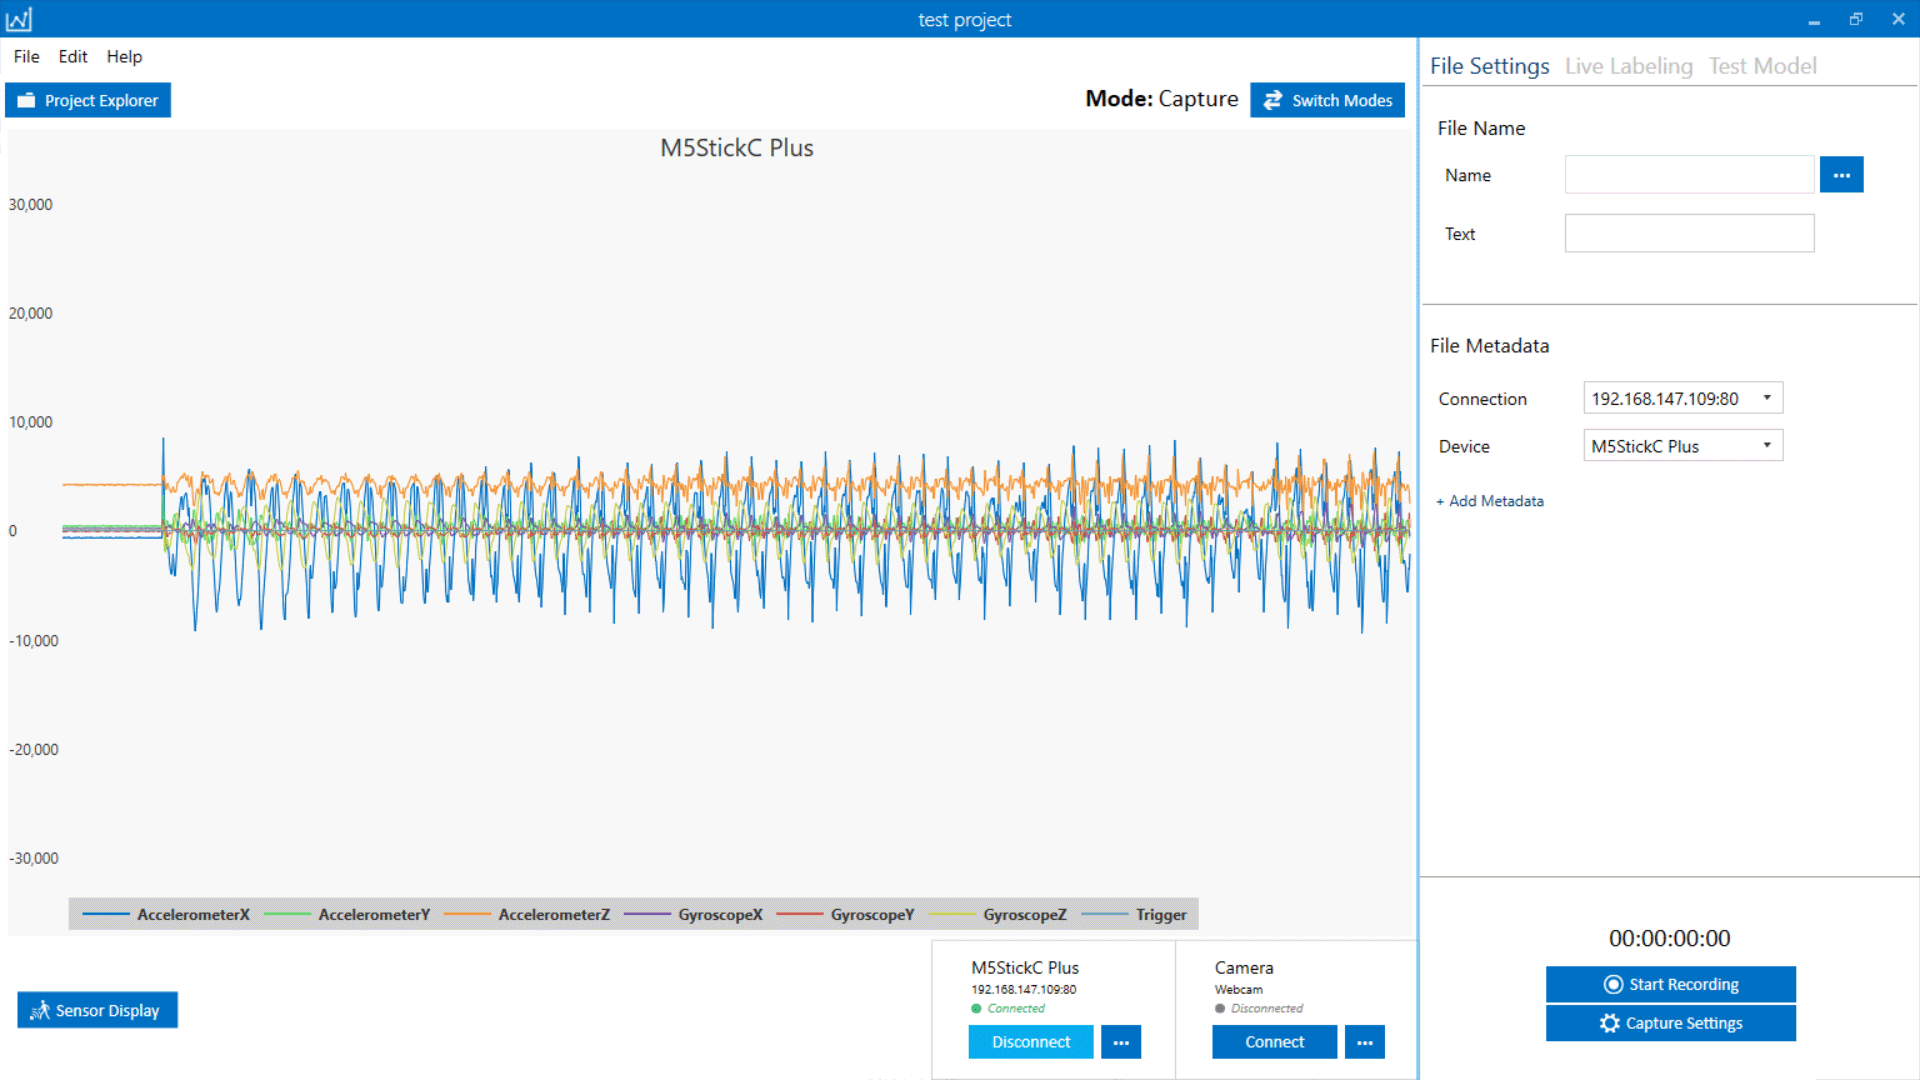
Now all that remains is to press “Connect” in the Data Studio. If the device connects you will see raw sensor data streaming in the Data Studio application window like below. You will also see the M5StickC PLUS change its screen from the Data Studio startup screen to the first target class from the example gesture application (an “S” gesture).
Note
If the Data Studio does not succeed in connecting, clues to the issue can be found under Help -> View Event Log.
By pressing the right side button on the M5StickC PLUS you can cycle through each of the target gesture classes until you have the one you wish to capture. This setting impacts the amplitude of the Trigger channel. Press the front button on the device with different target gestures displayed and you will see the Trigger channel square wave form streaming at various amplitudes that correspond to the target gesture. This greatly simplifies segmentation and labeling, taking nearly all the manual effort out of this task within DCL.
For illustration purposes, the reference firmware is setup to display the “Wizard Wand” example application gestures as the target classes in the DCL mode. These gestures can be replaced with your own target classes (ex. tennis swings, machine states, robot arm movements, etc.).

To modify the above class bitmaps shown on the device, edit the bitmap arrays in the m5_lcd_bitmaps.h file in the includes folder to display bitmaps representing the classes of interest for your own project. You will need to change the bitmap arrays using an RGB565 format of hex values and the image size should be 240 x 135 pixels. A useful Python script for converting .jpg image files to RGB565 format can be found here. If your class map differs from the six letter gestures + one unknown of our example application, you should modify the constant NUM_CLASSES in the Arduino sketch as well.
Source Code and Customization
Full source code and supporting files for the SensiML M5StickC PLUS reference firmware, including the wizard wand game and DCL mode, can be found on the SensiML GitHub site within the SensiML_M5StickC-PLUS repo at https://github.com/sensiml/SensiML_M5StickC-PLUS