Capturing Sensor Data
Next, we are going to go over how to collect sensor data from your device within the Data Studio. If you have your own tools for doing data collection, the Data Studio can import external sensor data files from any source. See more on importing data in the Importing External Sensor Data user guide.
If you are using the Slide Demo dataset, it already comes with 13 pre-collected sensor data files. This means you can skip data collection if you do not have a device at this time.
Follow the steps below to setup your device for data collection.
Open your project in the Data Studio
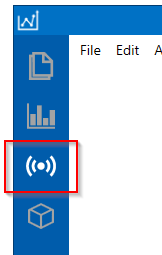
Click on the Live Capture button in the left navigation bar
Configuring Your Device
It is important you collect your sensor data with the same sensor settings that you plan to use for your event detection sensor. Collecting data with different settings can cause unexpected results depending on various aspects like sensor orientation and sensor calibration settings. It is also important that you configure the device with the same sample rate frequency you plan on using in your final product.
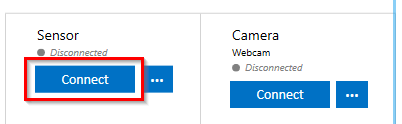
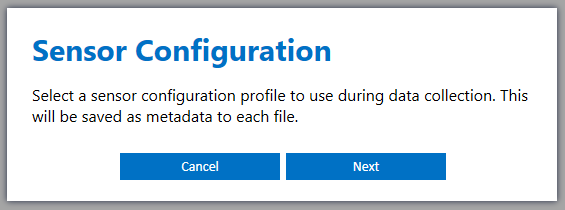
Click the sensor Connect button to setup your Sensor Configuration profile
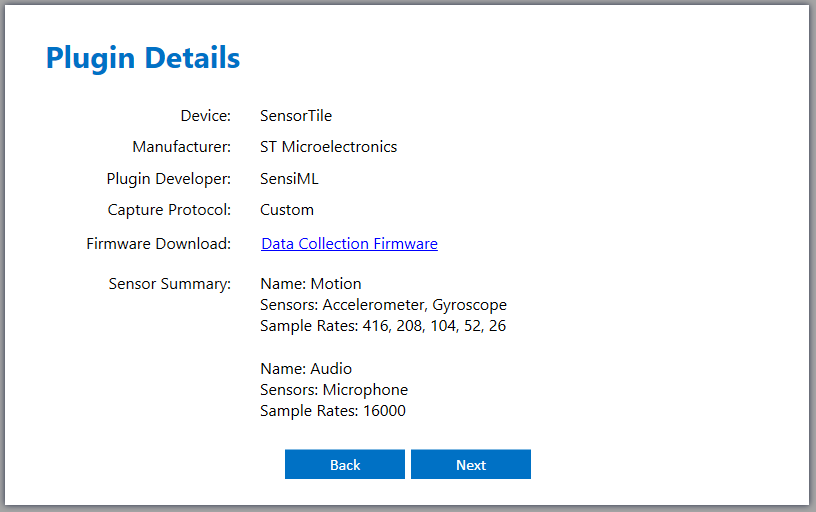
Click Next to select the device plugin to use in your Sensor Configuration
Select a plugin for the device you wish to use during data collection. If you are using a device not listed in the supported devices you can see more on how to implement your own plugin for data collection in the Adding Custom Device Firmware Documentation
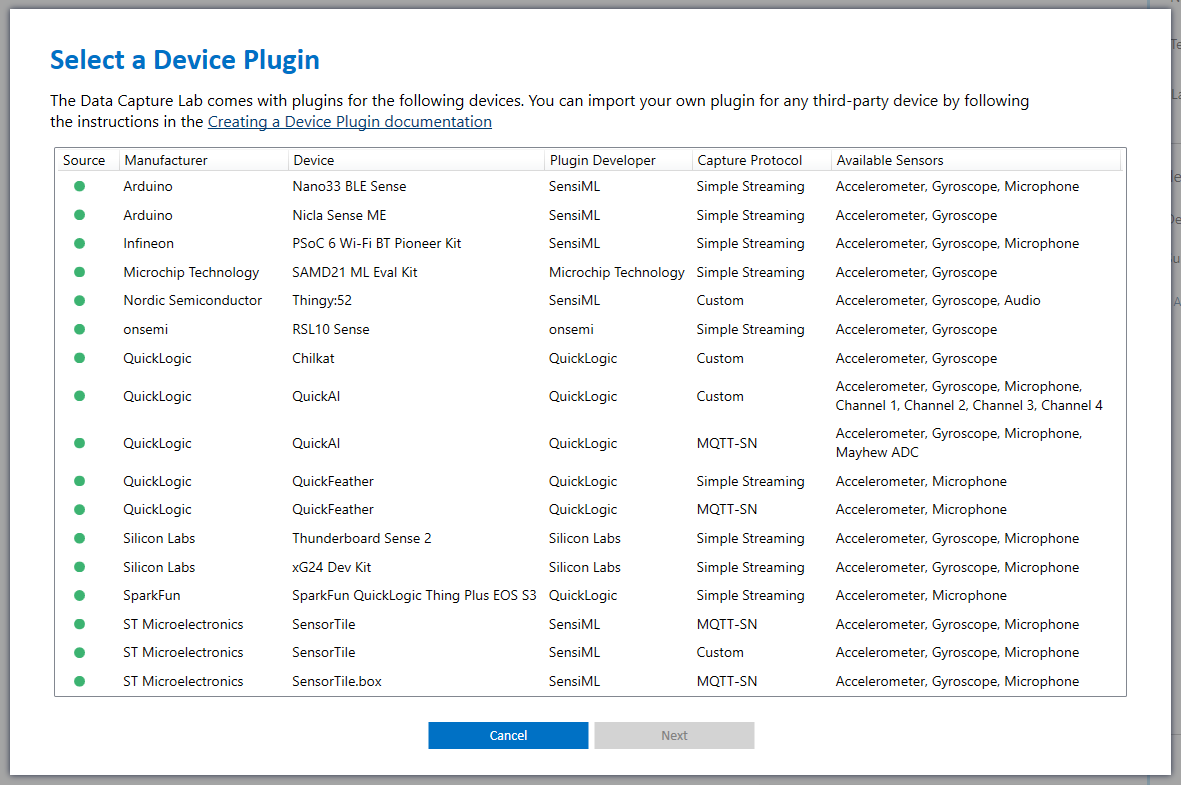
After selecting a plugin, the Data Studio will show more information about the plugin including the available sensors and documentation links. Each plugin will have different available options. Click Next to move to the sensor properties screen
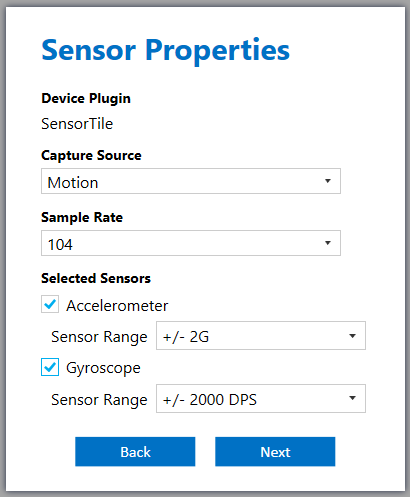
Select the sensor properties you wish to use for data collection and click Next.
Note
If you are following the Getting Started Slide Demo Project set sample rate to about 100 hz and select the Accelerometer and Gyroscope sensors if they are available in your device plugin
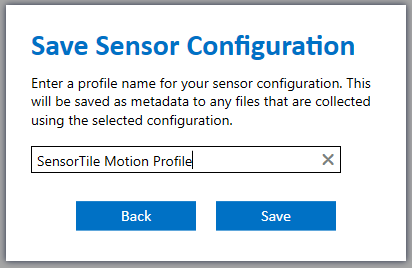
Enter a profile name for the sensor configuration and click Save
Recording Sensor Data from Your Device
Before you can use your device for data collection make sure it is flashed with data collection firmware. You can find more information on data collection firmware options and flash instructions in the Flashing Data Collection Firmware Documentation.
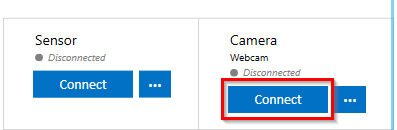
After setting up your Sensor Configuration profile, click Connect to connect to your device
Select the file settings you wish to save to your file during data collection
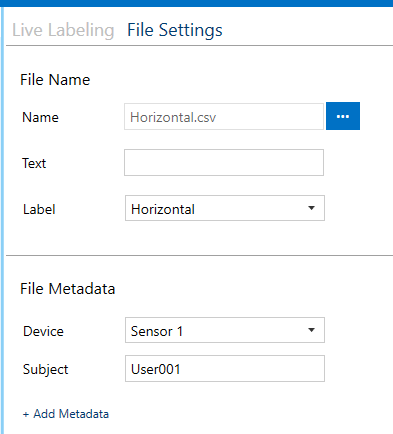
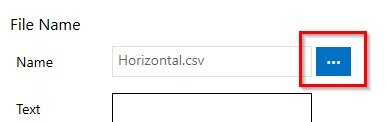
(Optional) Click the settings button next to the file name to customize your file name template
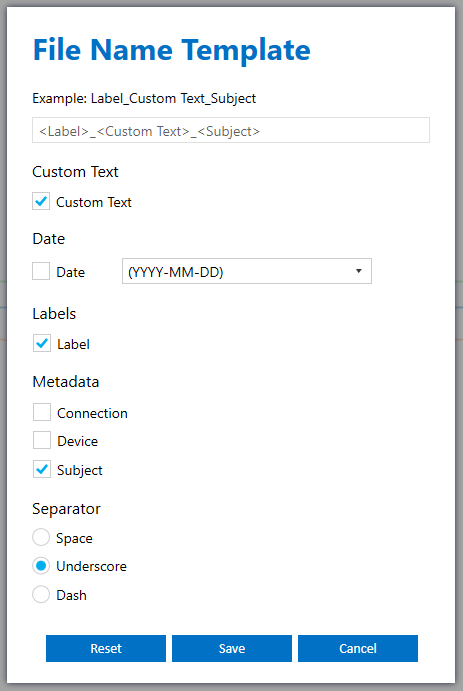
(Optional) The file name template screen lets you customize how the files you collect will be saved to your computer
(Optional) You can record video from a webcam or screen capture to sync with your sensor data. The Data Studio uses the SensiML Open Gateway application to record video. See the SensiML Open Gateway documentation for more details
Click Start Recording and the Data Studio will start recording based on your selected collection method. If you are using a connection that streams the data (Bluetooth-LE, Serial, etc) then the Data Studio will automatically save the file to your local hard drive and upload it to the cloud
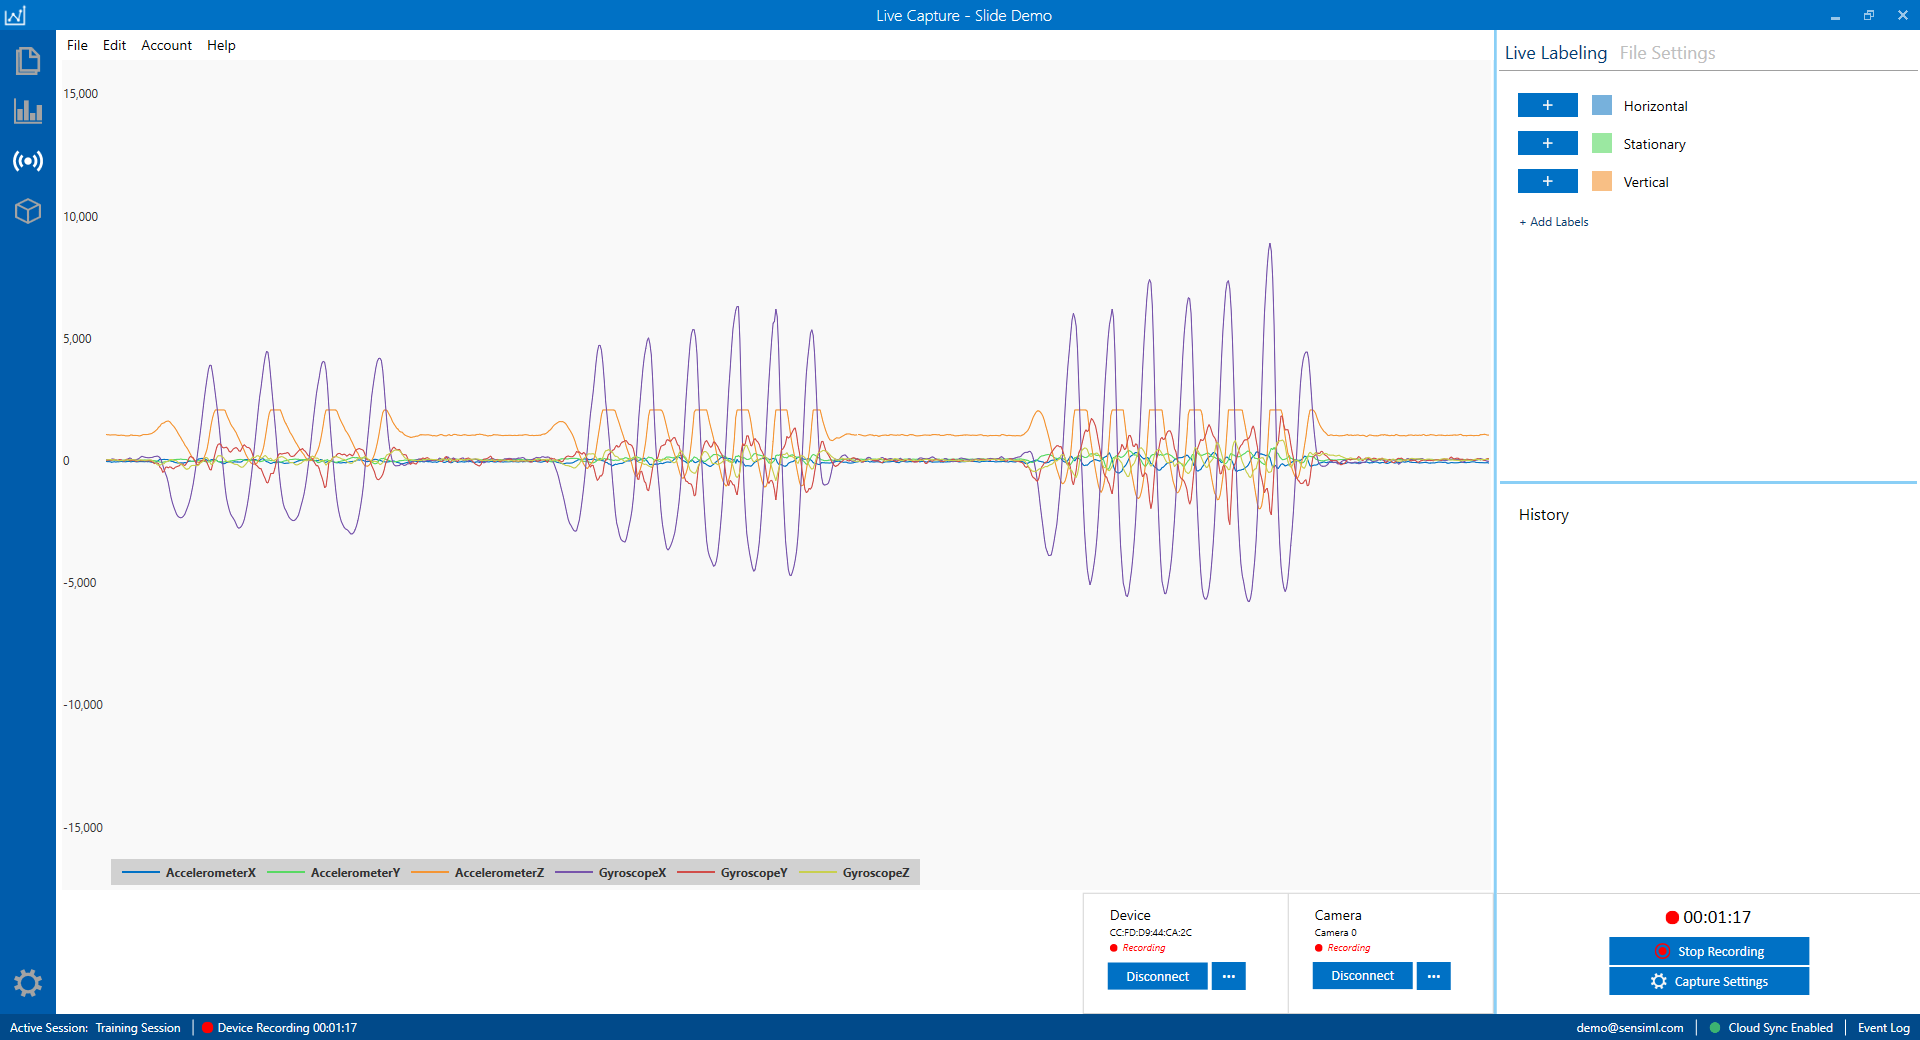
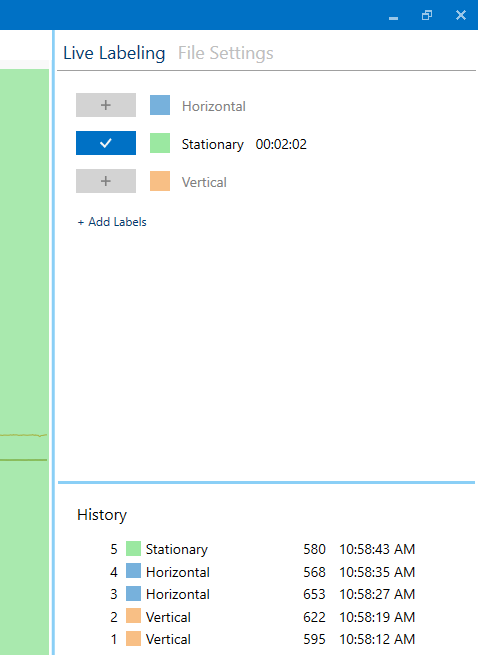
(Optional) You can create labels in your file during data collection by using the Live Labeling feature. Live Labeling lets you label your events in real-time during data collection. Click the + button on any label to add a label to your file
At this point we will capture examples of all the events you are trying to detect in your project. The amount of data you need to collect will be different from project to project depending on the events of interest and amount of variation you are looking to build in your project. In the Slide Demo Project there is only three simple events to detect so we do not need a lot of data.
Collect 4 files for each of the events in the Slide Demo events (Horizontal, Stationary, Vertical). Each file should last for 60 seconds. In the end you should end up with a total of 12 files in your project. Note that if you downloaded the Slide Demo dataset it already comes with pre-collected files so you do not need to collect any new data
As you collect your files, it’s good to keep in mind how much variation you want in your events of interest. You are essentially training your project with examples of what you want to detect, so you want to make sure to collect enough variation in your events of interest to build a robust model. For example in the Slide Demo, while collecting the Stationary events you may want to tap on the table near your sensor so that small vibrations are not misclassified as a Vertical event. For the Horizontal and Vertical events you may want to collect small and large gesture examples so that your project can detect more robust events of interest.