Integrating MQTT
Communication Method
In this tutorial we communicate between the host application and the target device (SensorTile.box) over USB serial. The Data Studio roadmap has plans to integrate support for BLE, TCP/IP over Wi-Fi and Cloud API’s.
Integrate the MQTT Library
You will need to port the MQTT library to your device. We use the open-sourced implementation for MQTT developed by IBM available here. Implementations of the topics to interface with the host application are found here. For live streaming, you only need to implement a subset of these topics on your device.
Host application for debug
In order to see your messages come through from the device, you will need a message broker (RSMB), a Serial to UDP bridge, and a third client to send and receive MQTT-SN messages.
RSMB:
RSMB executable bundleSerial UDP bridge
Serial UDP Bridge Console App bundleMQTT Client: http://mqtt-explorer.com/
After unzipping the console application, options.json will allow you to configure what com port is connected with the SerialPortNum setting:
{
...Other options
"SerialPortNum": 28,
"BaudRate": 115200,
}
Note: for SensorTile.box, the BaudRate should be set to 921600
Implement your first TOPIC
We recommend first implementing the SYS_VERSION topic and verifying your device is correctly communicating with the Data Studio. You will need to make sure your device can receive the _REQ (request), and send the _RSP (response). You can use any string for your version for debug.
The Data Studio will request SYS_VERSION, SYS_COMPDATETIME, and SYS_DEVICE_UUID upon connecting.
To use the host applications for debug - ensure you have downloaded and installed MQTT Explorer and RSMB/UDP bridge.
First, run RSMB: .. code-block:
.\ReallySmallMessageBroker.exe .\rsmb_config.txt
Then, run the UDP bridge: .. code-block:
.\MqttConsoleApp.exe -j .\options.json
Press ‘S’ in the Console application to start the bridge and connect to your device.
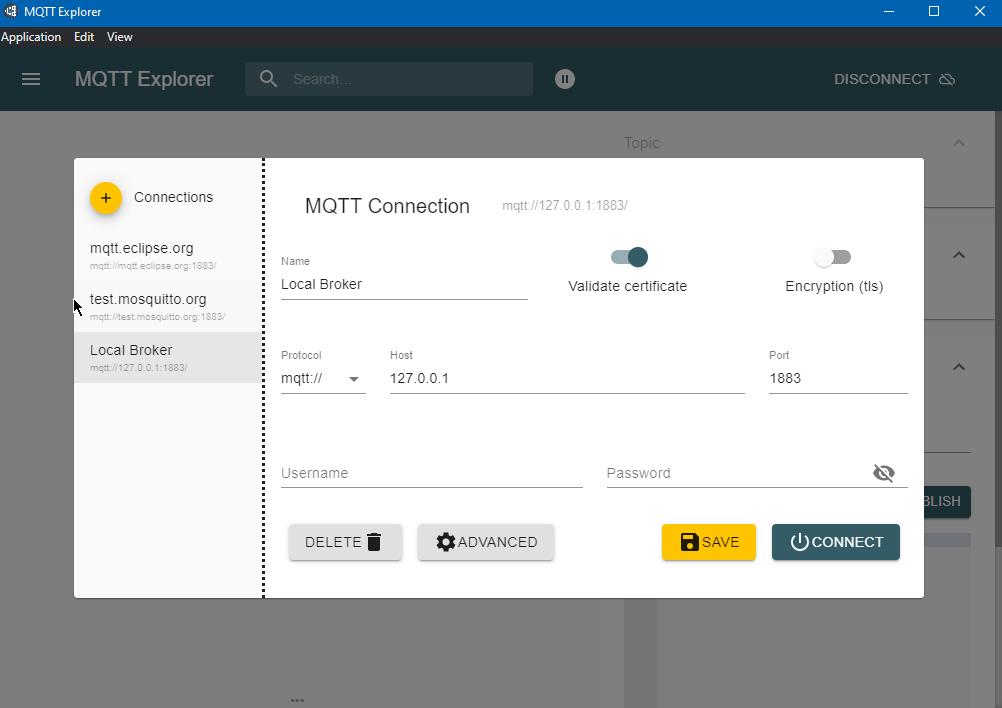
- Then, Run MQTT Explorer. You’ll need to add a local connection:
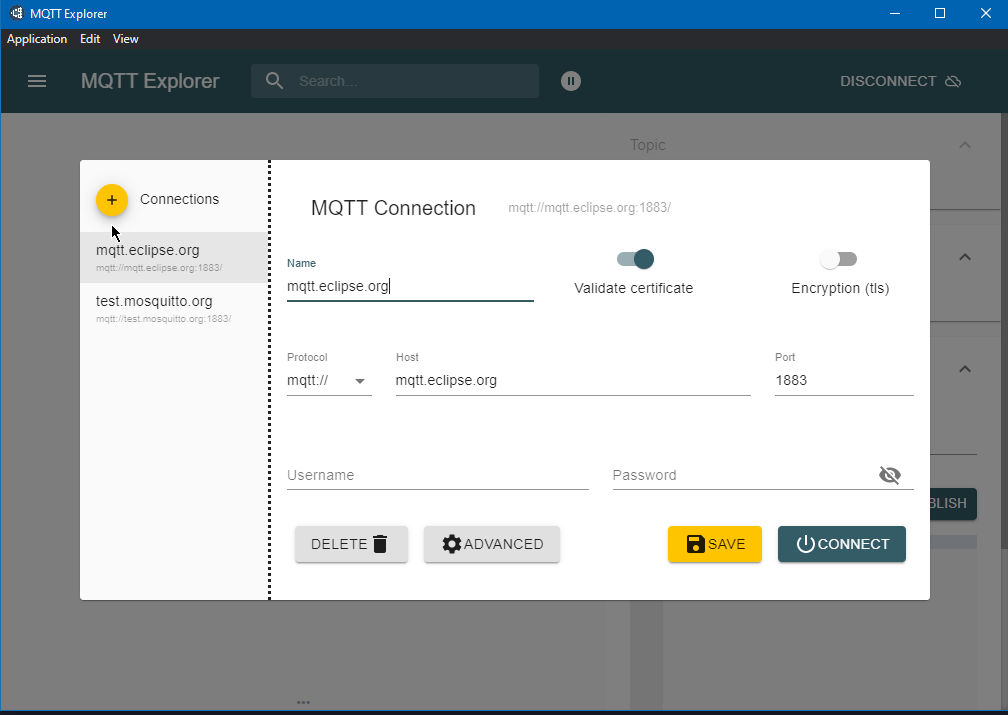
- Configure the new connection to point to your local RSMB:
- Publish your request message (for topics with payloads, you will need to hand-type the payload. This example uses the Version request, which is empty):
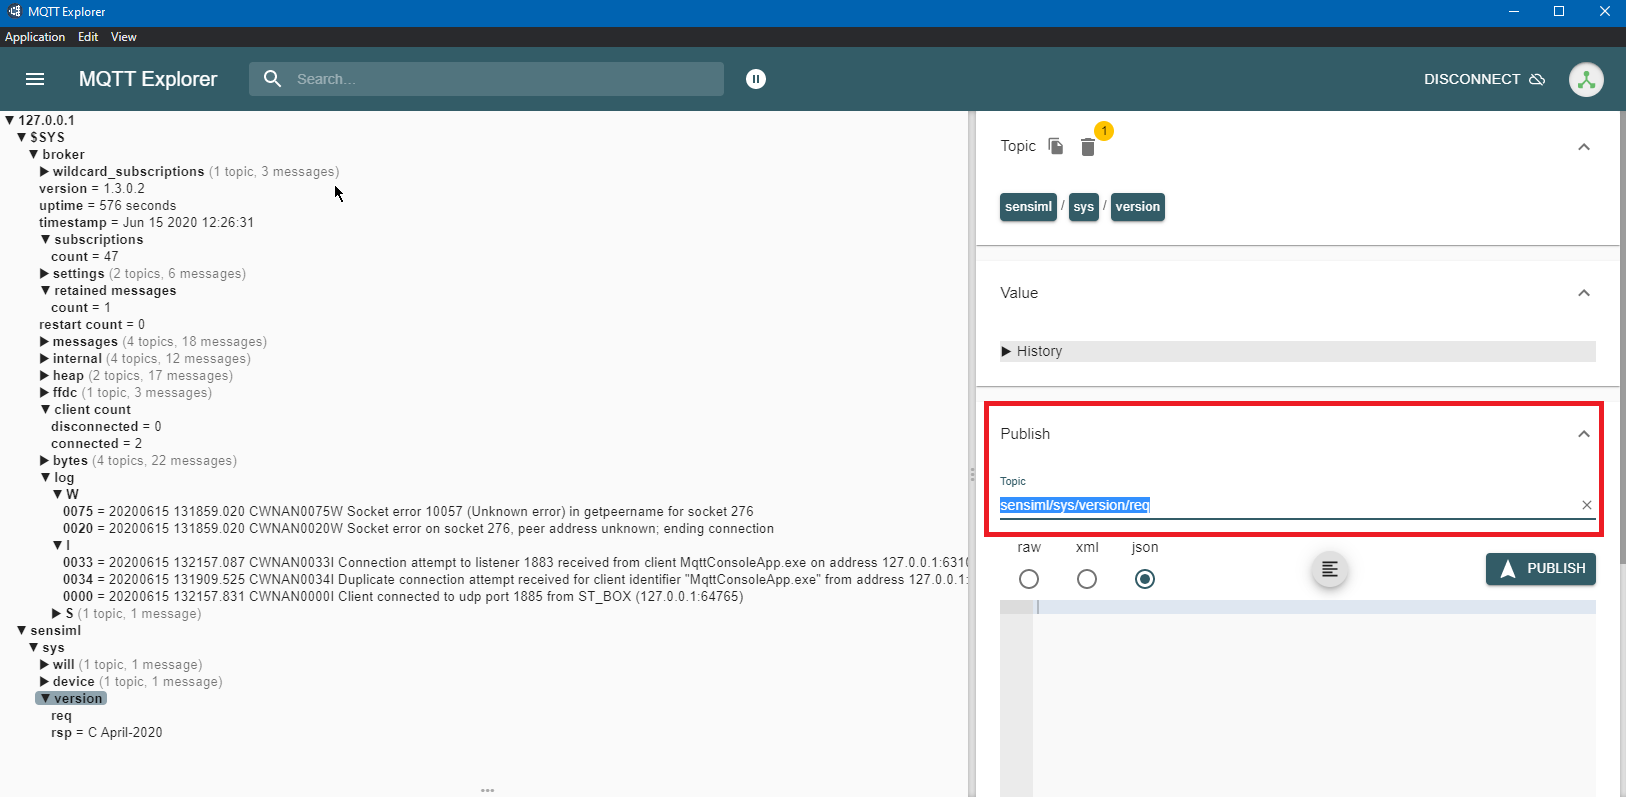
- On the left-hand side of MQTT-explorer, you will see a sensiml/ topic tree appear. you can expand it to see the response. You can verify it matches what you have set on the device
-
Device ID
Each sensor board has 2 UUIDs associated with the board:
DEVICE_DCLASS UUID – This identifies the type or class of board.
DEVICE_DUNIQUE UUID – This UUID functions like a serial number.
All boards of type FOO - have the same DCLASS_UUID. All boards of type BAR would have a different DCLASS_UUID.
The scope of the DUNIQUE_UUID is within the DCLASS_UUID name space. The combination of DCLASS_UUID + DUNIQUE_UUID must be unique.
Create a DCLASS_UUID
Create a DCLASS_UUID for the board (See: TOPIC_SYS_DEVICE_UUIDS_REQ).
The basic list of commands that should be implemented at this stage are.
Required SYS commands
TOPIC_SYS: System configuration and reporting
TOPIC_SYS_DEVICE_UUIDS: Get Device Id
TOPIC_SYS_COMPDATETIME: Get device time
TOPIC_SYS_VERSION: Get version of software running on firmware
TOP_SYS_STATUS_CLR: Clear status messages
TOP_SYS_STATUS: Read status messages
Verify Data Studio Communication
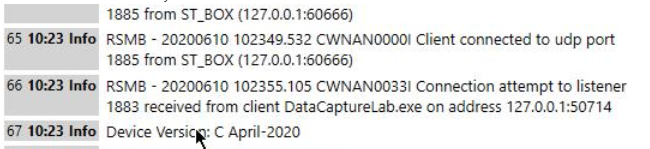
After implementing TOPIC_SYS_VERSION you can connect to your device in the Data Studio and verify it is working correctly by checking the event log, Help -> View Event Log. The first message that the Data Studio sends is a request for the SYS_VERSION_TOPIC. You will see the response in the logs, and after that you will see errors until you implement the rest of the TOPICS needed on your device.
Note
In order to verify this with the Data Studio you will have to first create the SSF plugin for your device